


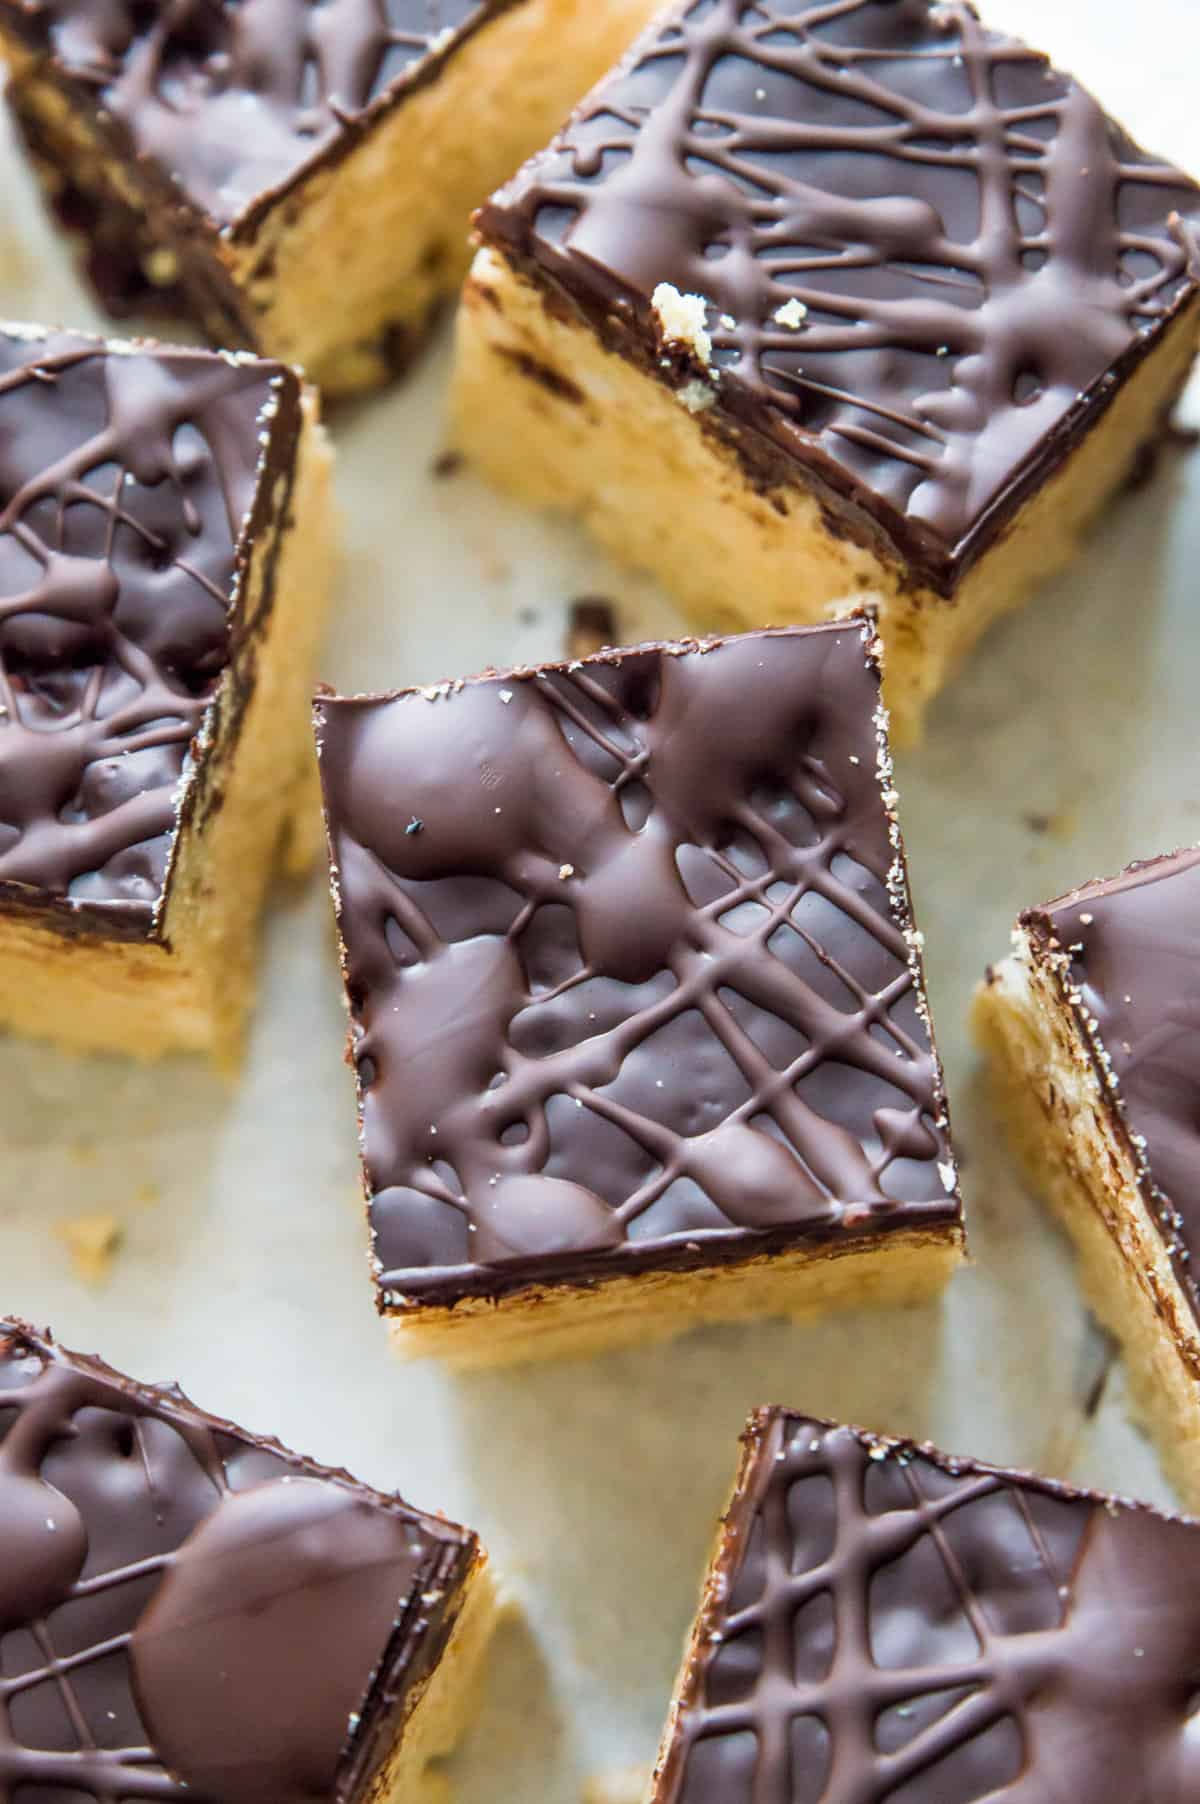
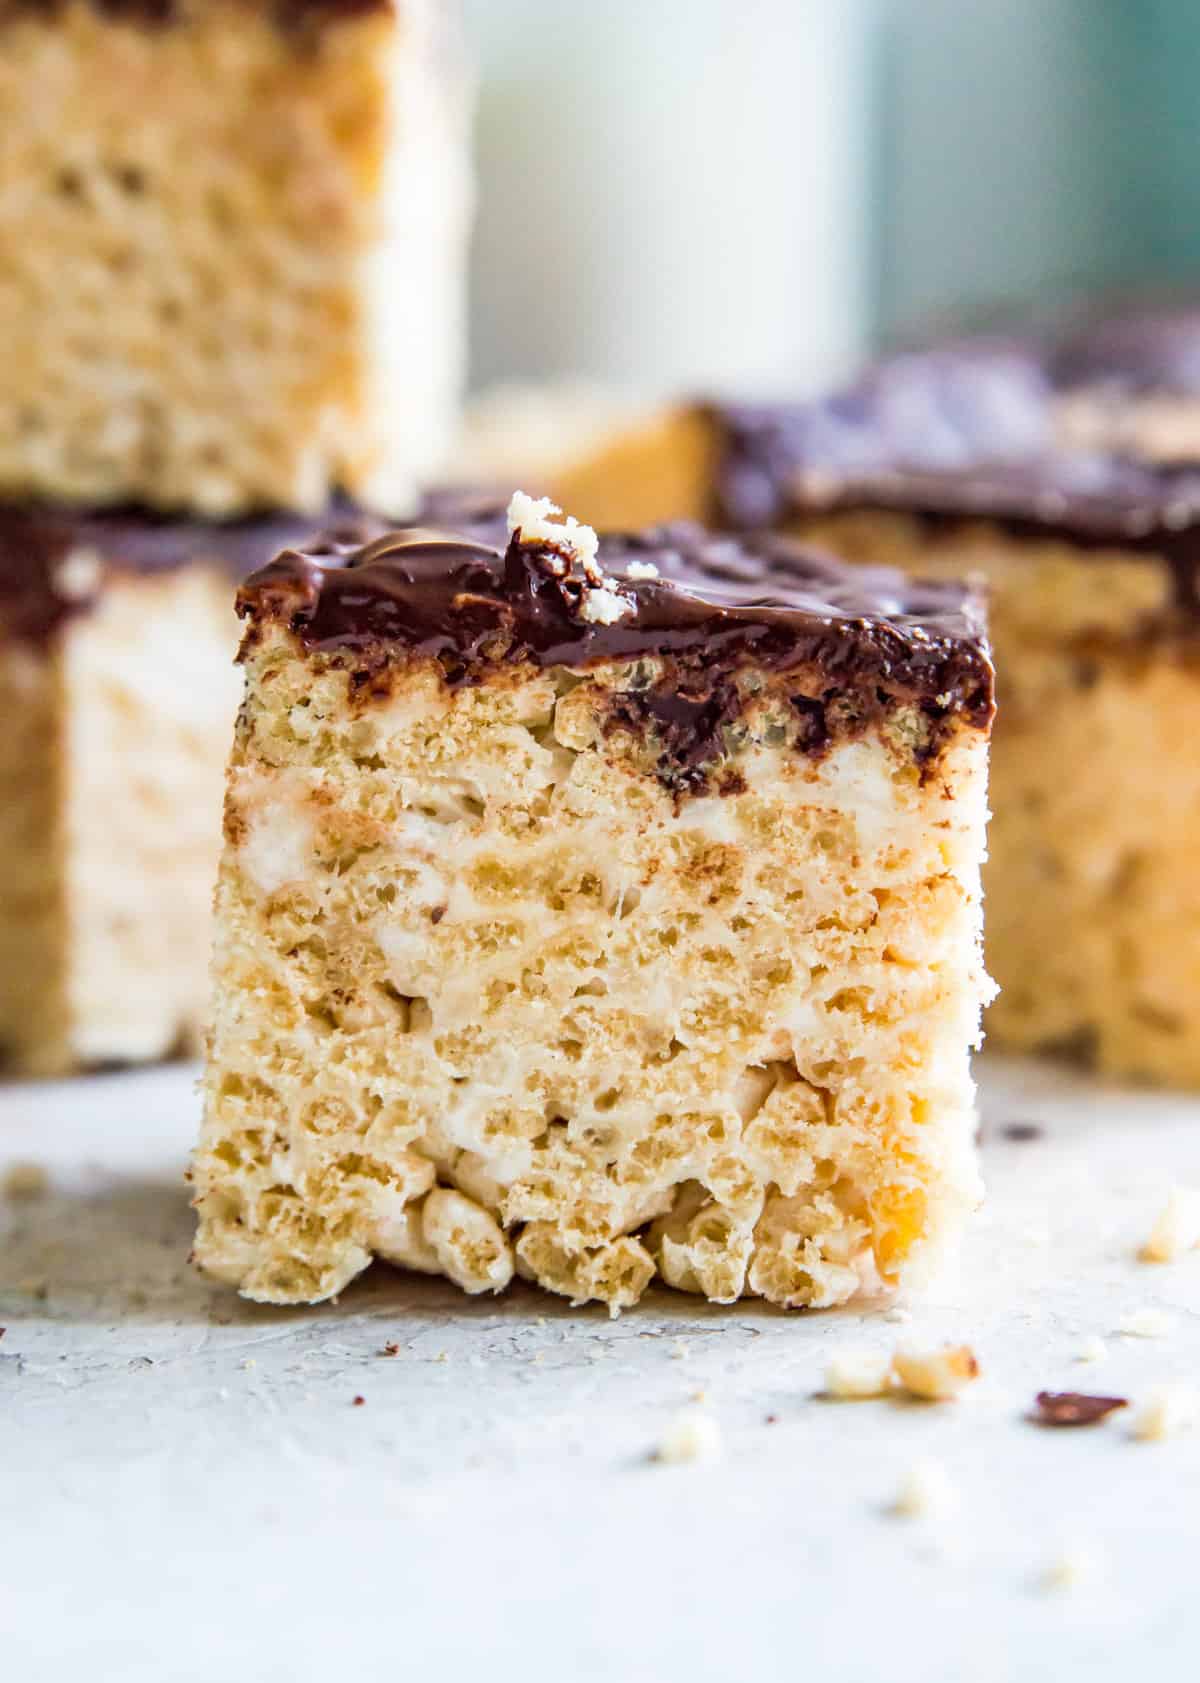
These are the best chocolate covered Rice Krispie treats! This homemade dessert is so easy to make and you only need 5 ingredients to make them. This recipe can also easily be made gluten-free, dairy-free and vegan too.
Would you like to save this for later?
Table of Contents
Why you will love this recipe:
- The flavour! These chocolate Rice Krispie Treats are the best sweet treat. They are sweet and gooey on the inside, yet nice and crispy on the outside. The dark chocolate coating contrasts perfectly with the sweet marshmallow filling and helps make this dessert even more decadent.
- This no bake dessert is so quick and easy to make and only requires a few minutes of hands on time.
- You only need five ingredients to make these homemade Rice Krispie squares.
- You can easily make this dessert gluten-free, dairy-free or vegan.
- This is a kid friendly dessert that they can also help make.
- These treats are simple enough to make anytime but are also delicious enough to serve for special occasions like baby showers, halloween, birthday parties, Valentine's day, or Christmas.
If you love rice krisp treats you will also love Pumpkin Rice Krispie Treats and peanut butter and chocolate Rice Krispie Treats.
Ingredients and substitutions:
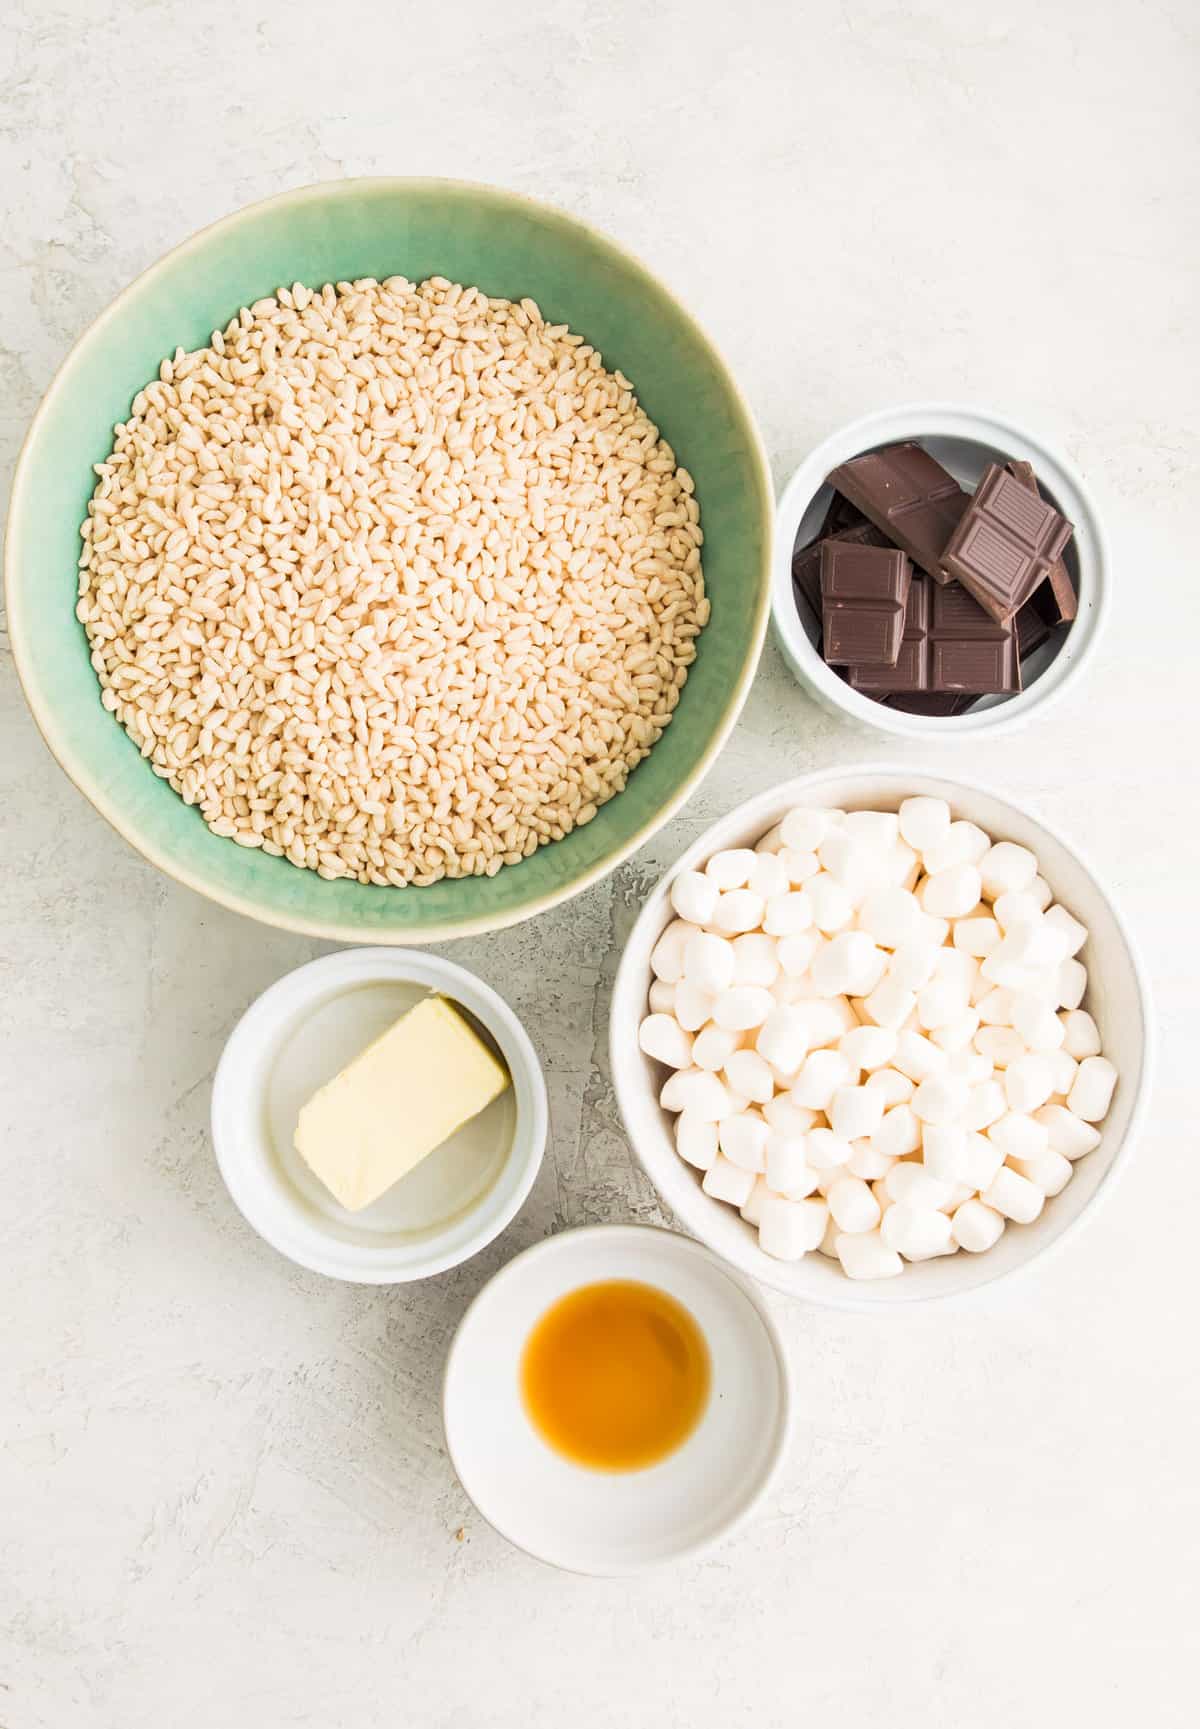
- Rice Krispies cereal - you can use Kellogg's Rice Krispies or another brand of rice crisps cereal or rice krispie cereal. If you are gluten-free be sure to use gluten-free Rice Krispies or anther brand of gluten-free rice crispy cereal.
- Marshmallows - you want to use mini marshmallows to make this recipe. It's also best to use fresh marshmallows. If the marshmallows are stale they won't melt as well and so the squares will turn out harder, rather than soft and chewy.
- Salted butter - to help make this treat extra soft and gooey. If you are dairy-free or vegan use a dairy-free salted butter or vegan butter.
- Vanilla extract - to help enhance all the delicious flavours of this dessert.
- Chocolate - chocolate is what takes this dessert to the next level. I prefer to use dark chocolate but you can use any type of chocolate that you like including milk chocolate or white chocolate. You can use any type of chocolate that will melt including chocolate bars, chocolate chips or baking chocolate.
How to make (step-by-step):
Step one:
First, line an 8" x 8" baking pan with parchment paper.
Step two:
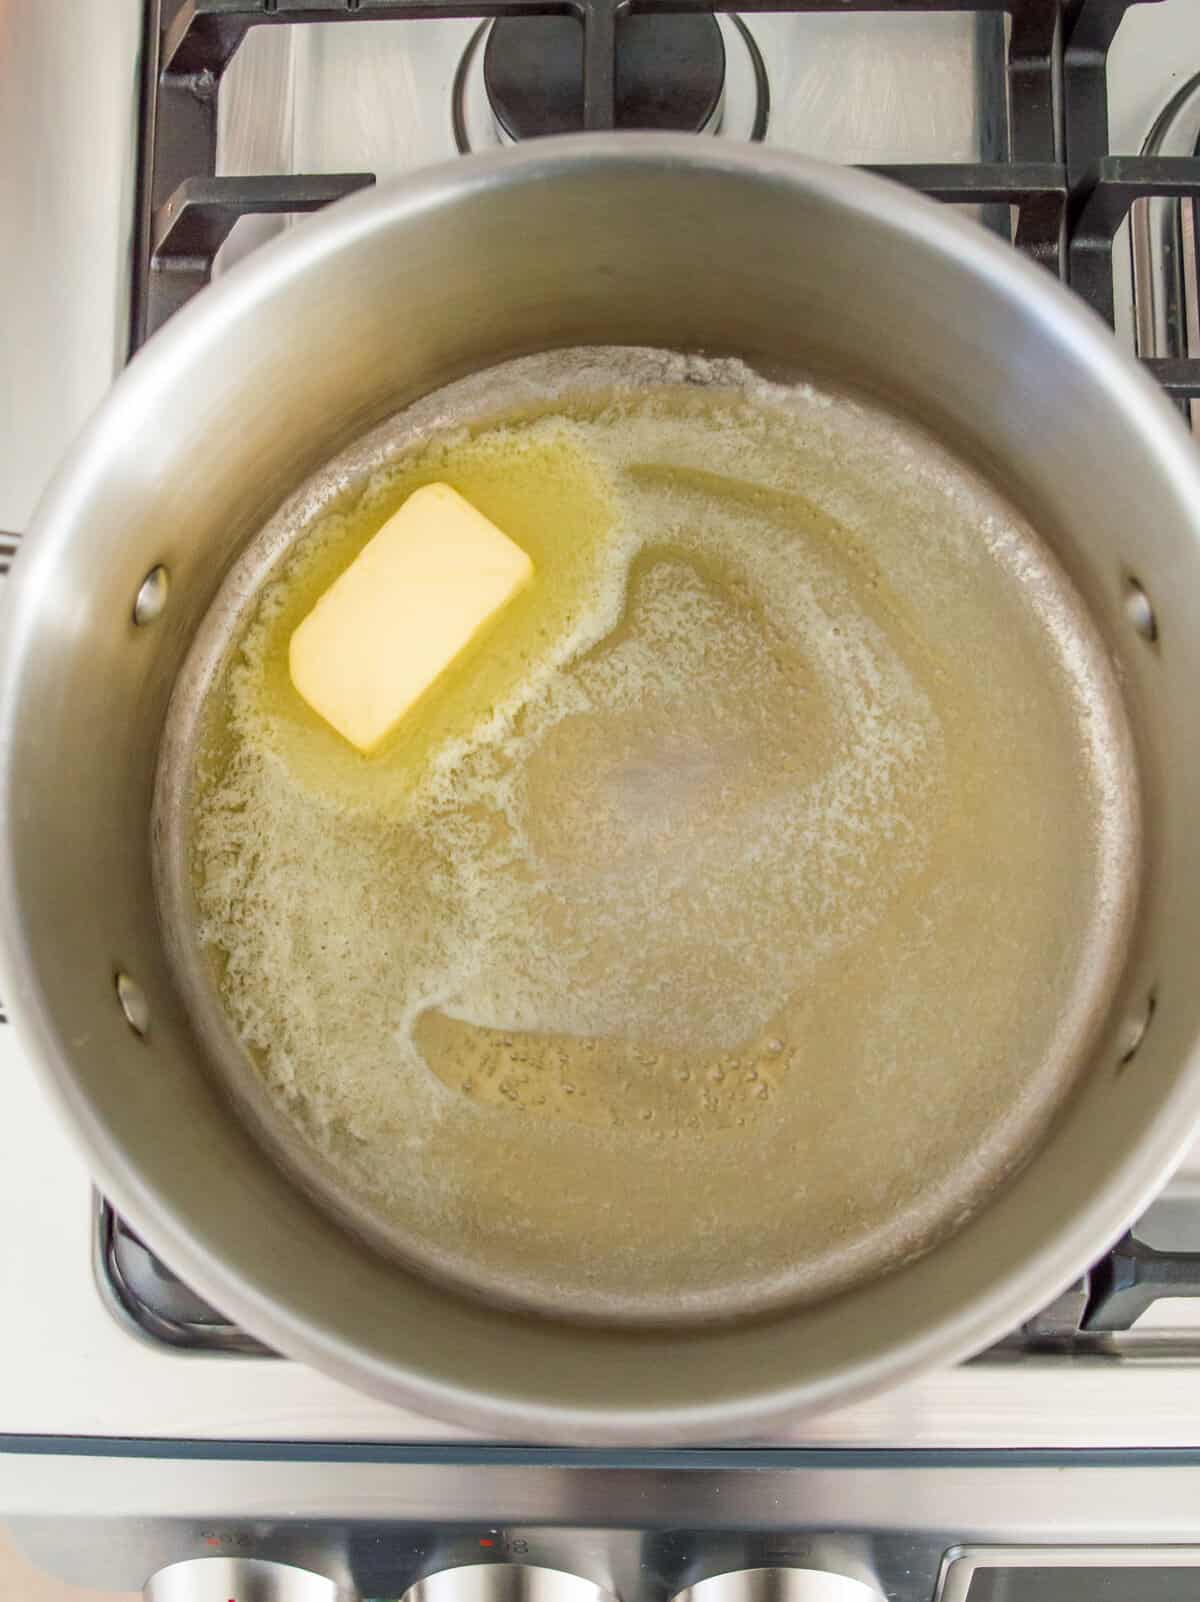
Next, melt the butter over low heat in a large pot on the stove top, stirring regularly to prevent the butter from burning.
Step three:
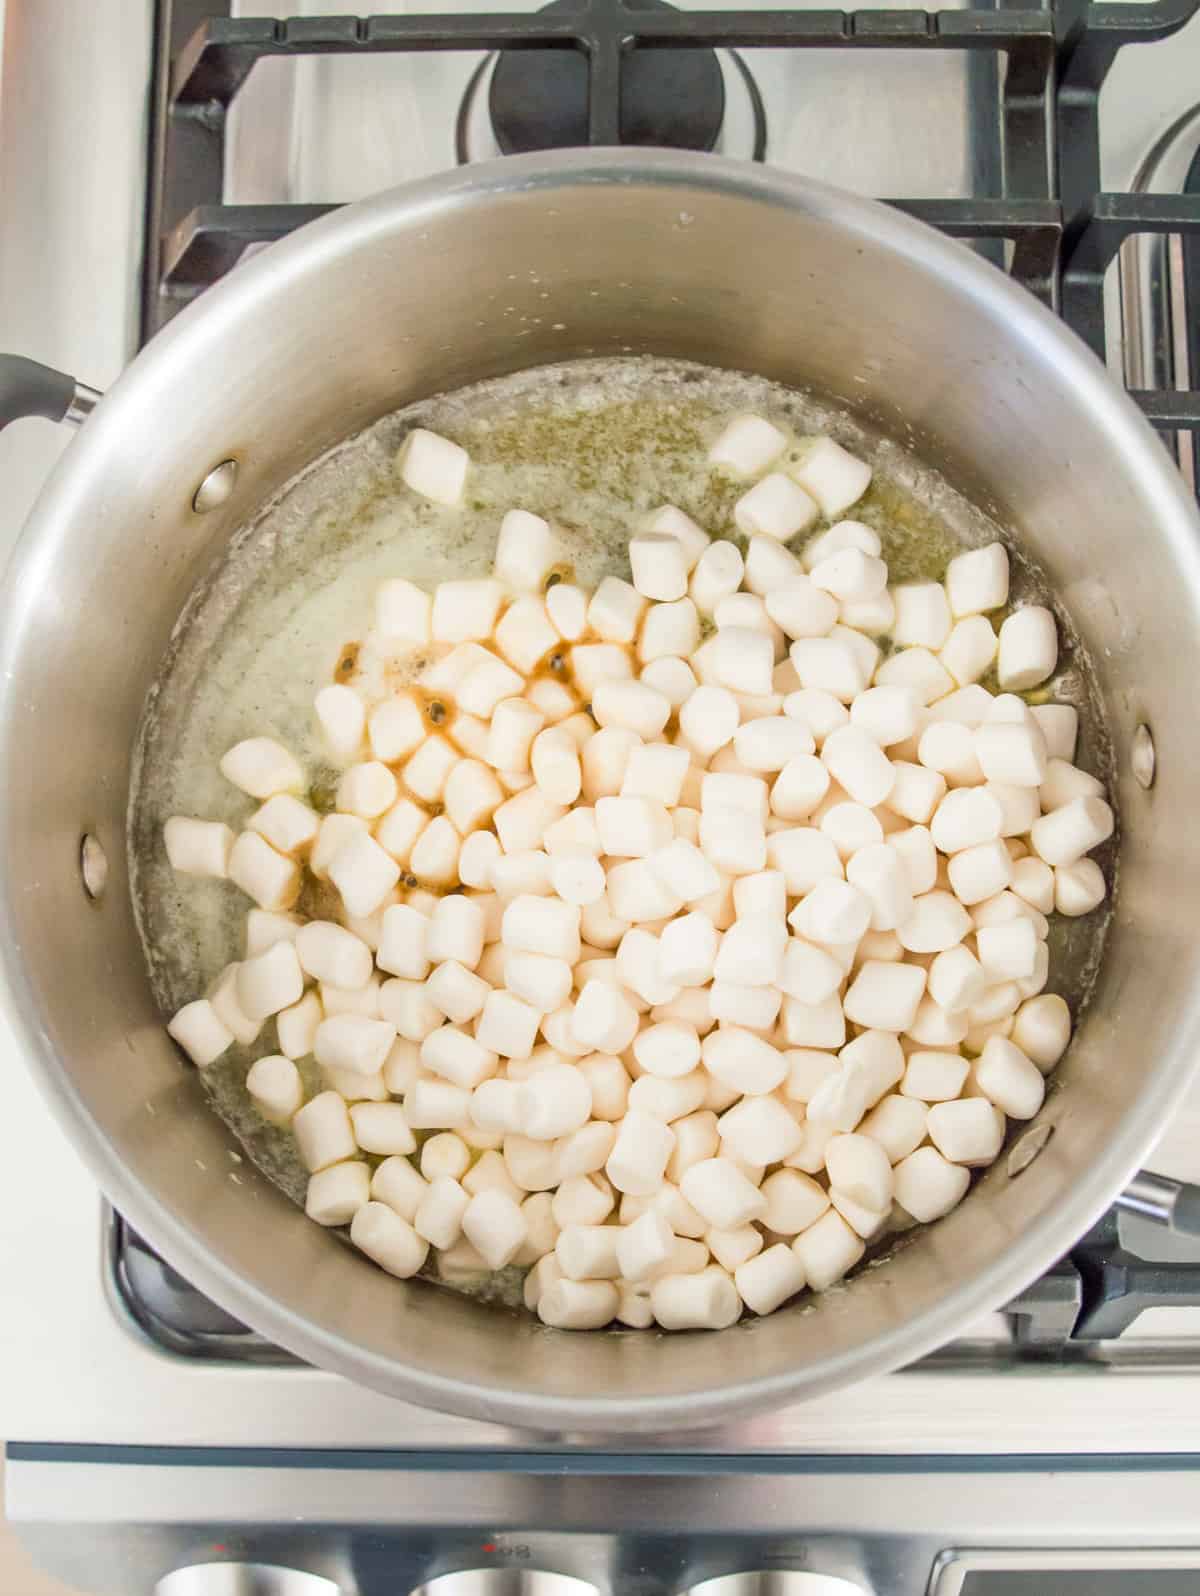
Once the butter has melted, add the marshmallows and vanilla extract to the pot. Stir the mixture until the marshmallows are completely melted, stirring frequently to prevent burning.
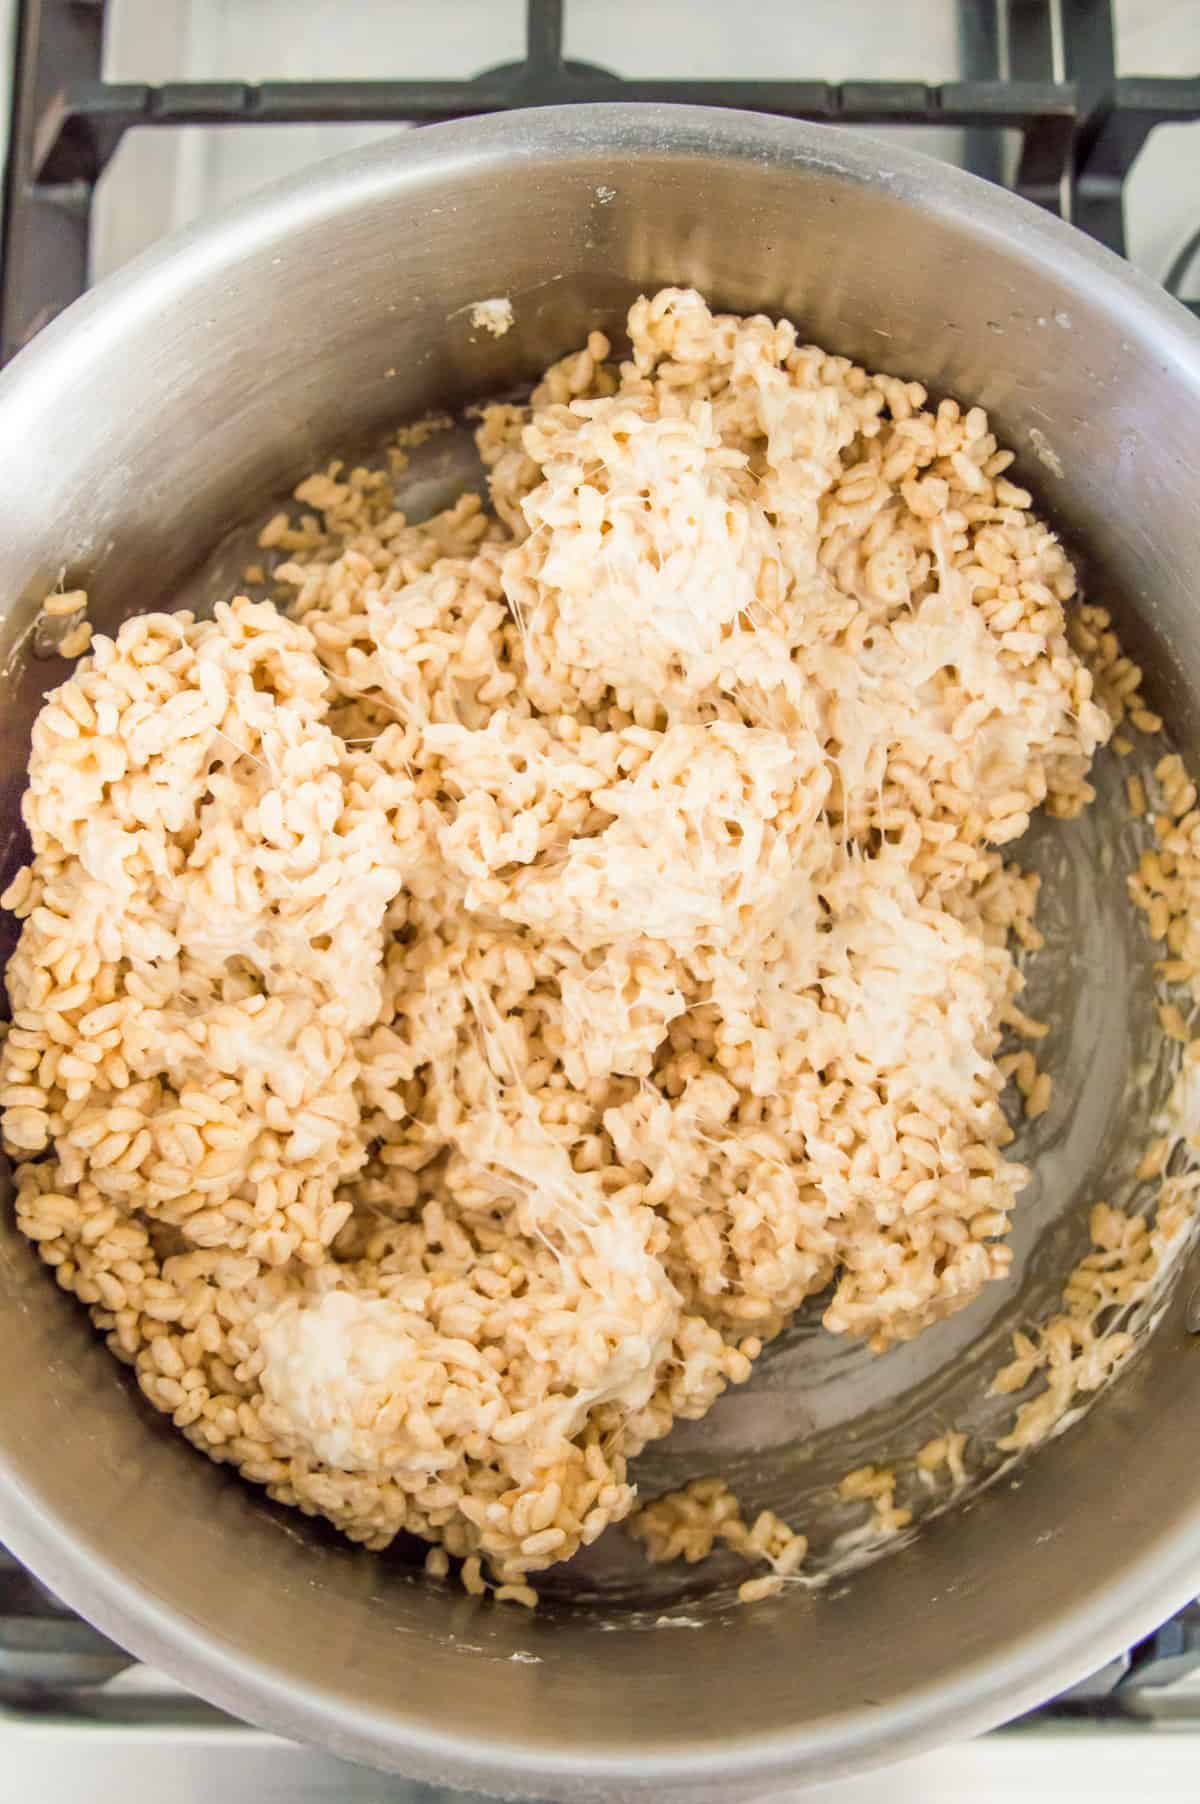
Step four:
Now remove the pot from the heat and fold in the cereal. Try to make sure that each piece of cereal is coated with the marshmallow mixture.
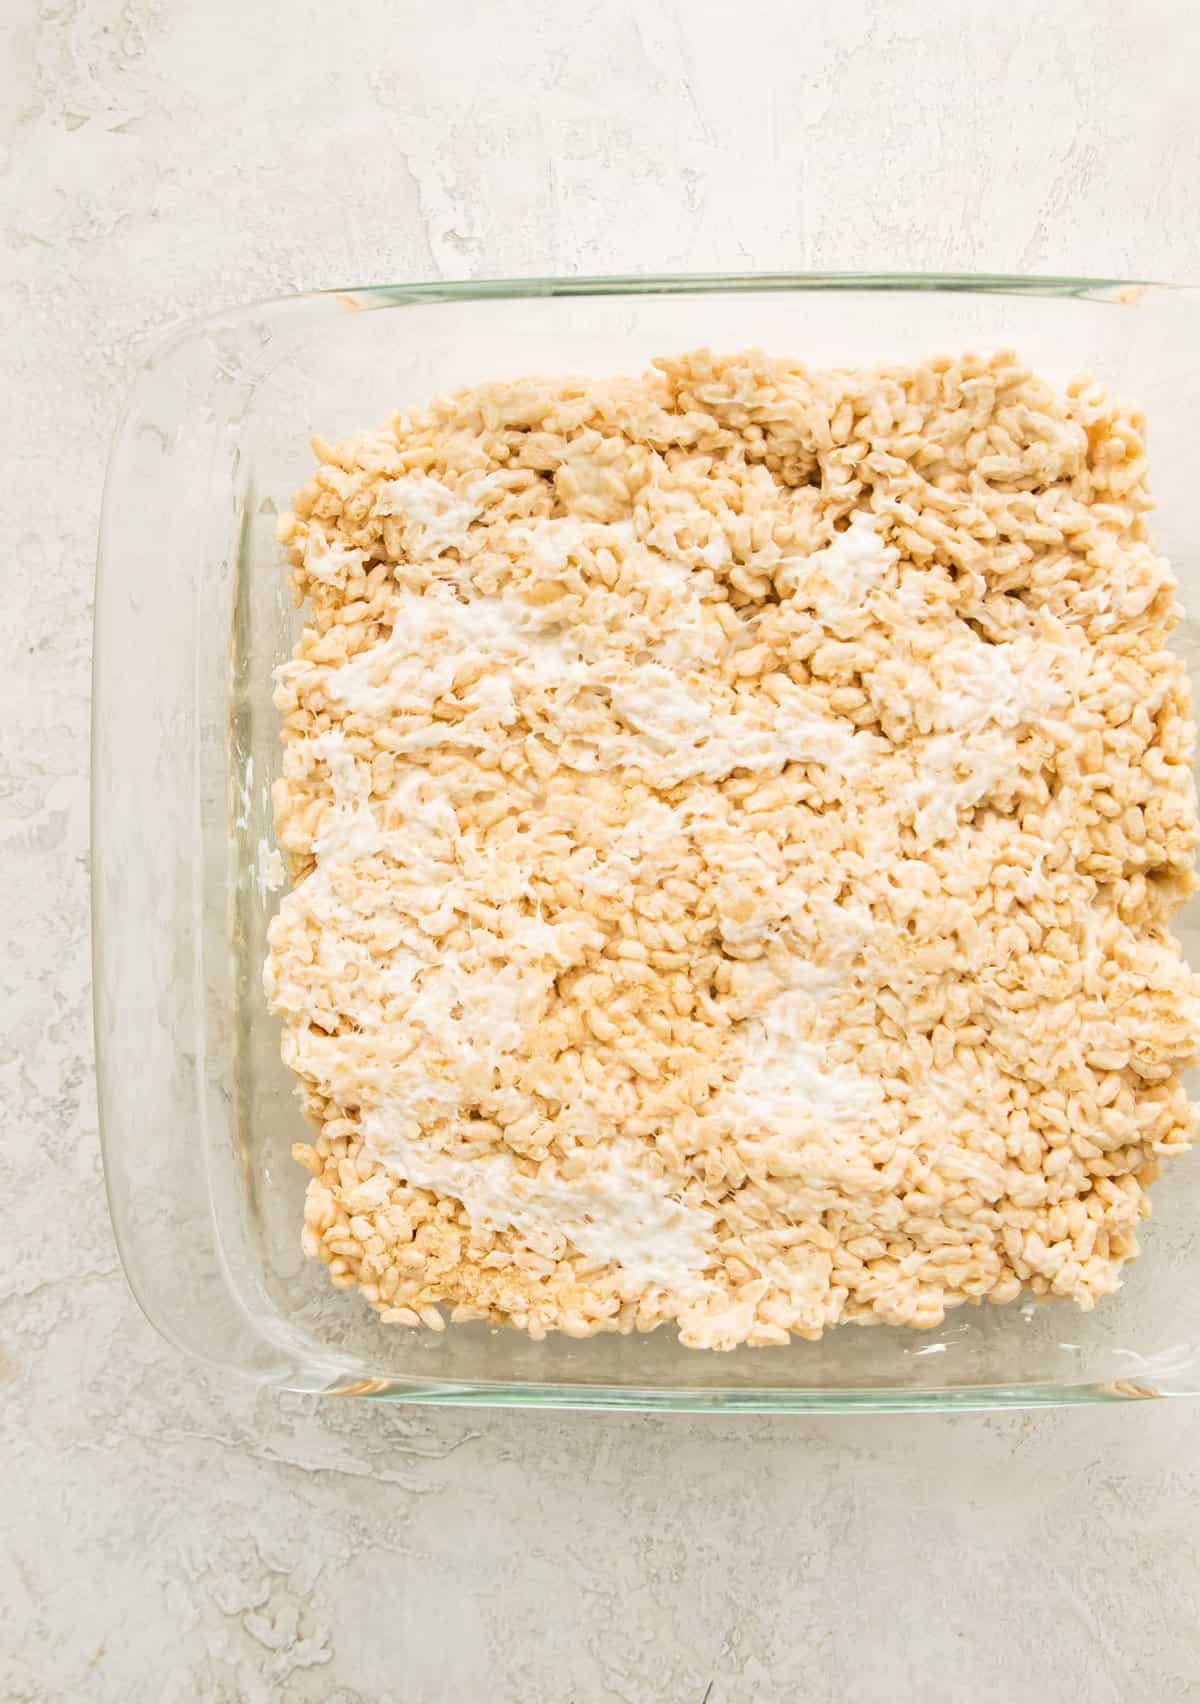
Step five:
Then transfer the cereal mixture to the prepared baking pan. Gently spread the mixture to fit the pan and press it down lightly so you have an even layer.
Step six:
Put the chocolate in a microwave-safe bowl or dish, and heat it on high for 30 second intervals until melted.
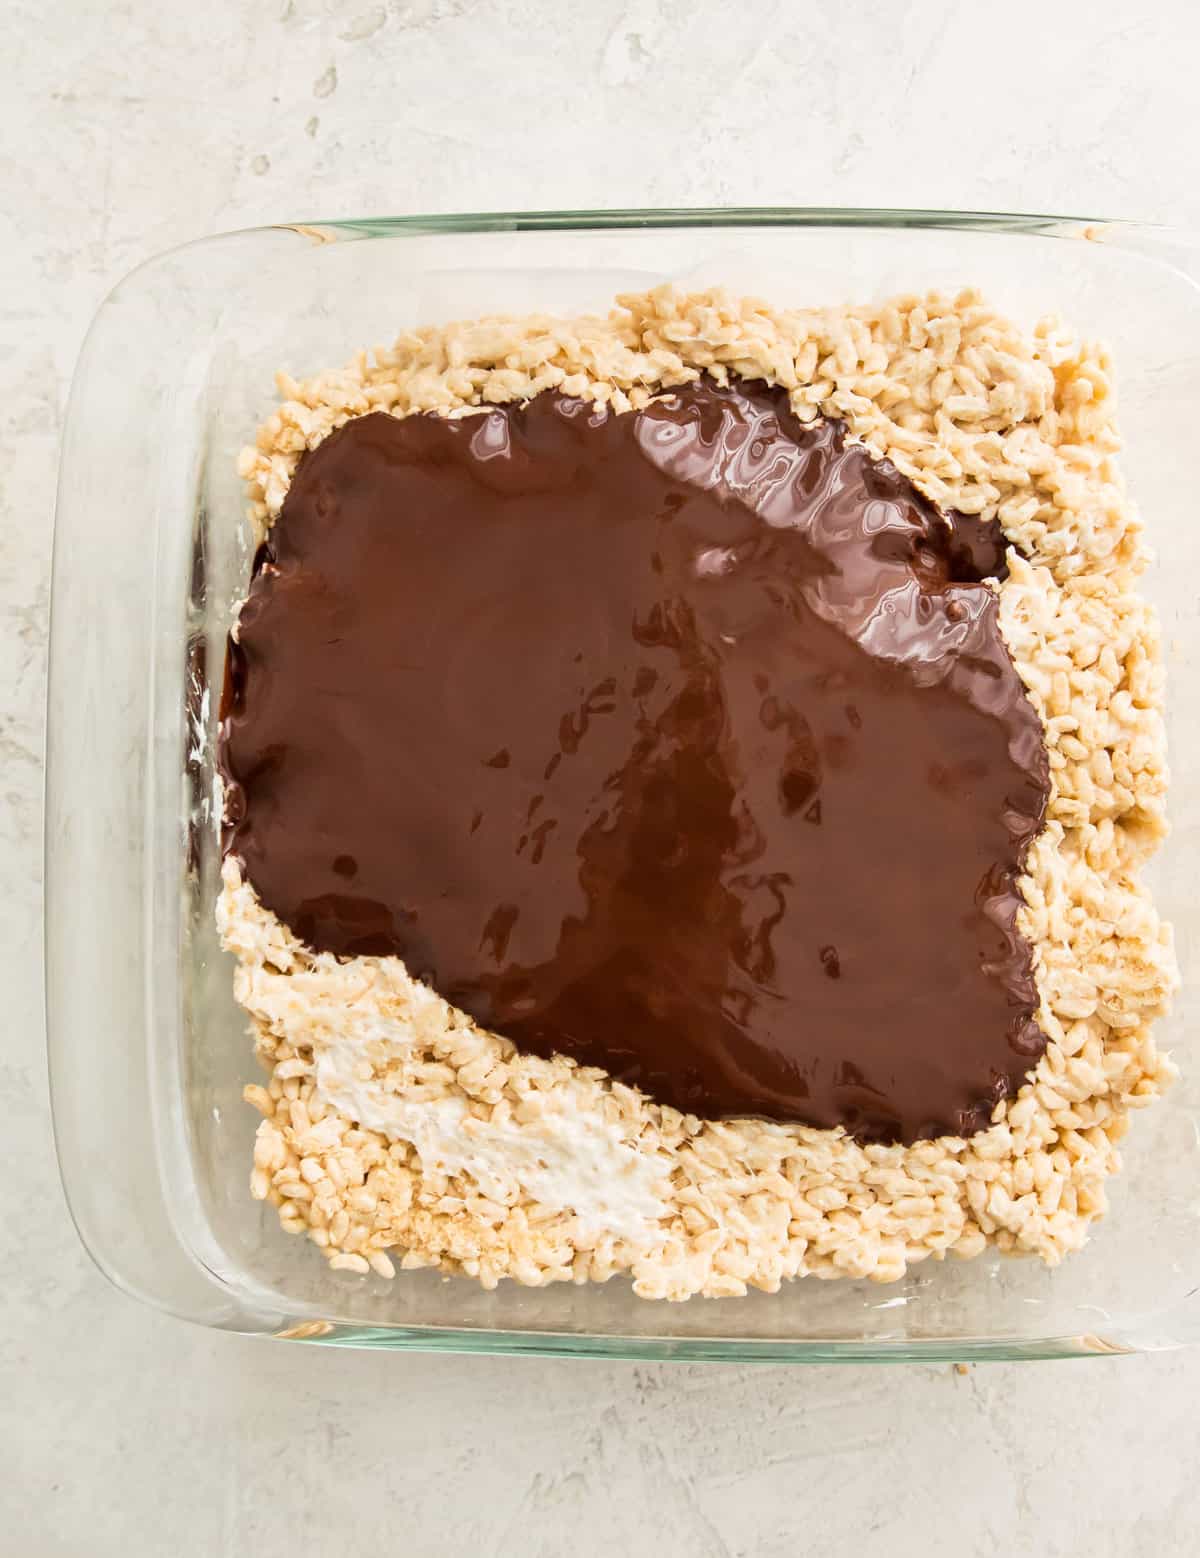
Step seven:
Pour the melted chocolate over the Rice Krispie treats and spread the chocolate evenly so you have a smooth layer. Then transfer the pan to the fridge for 20-30 minutes to let the chocolate harden, or let them set for 1 hour at room temperature instead.
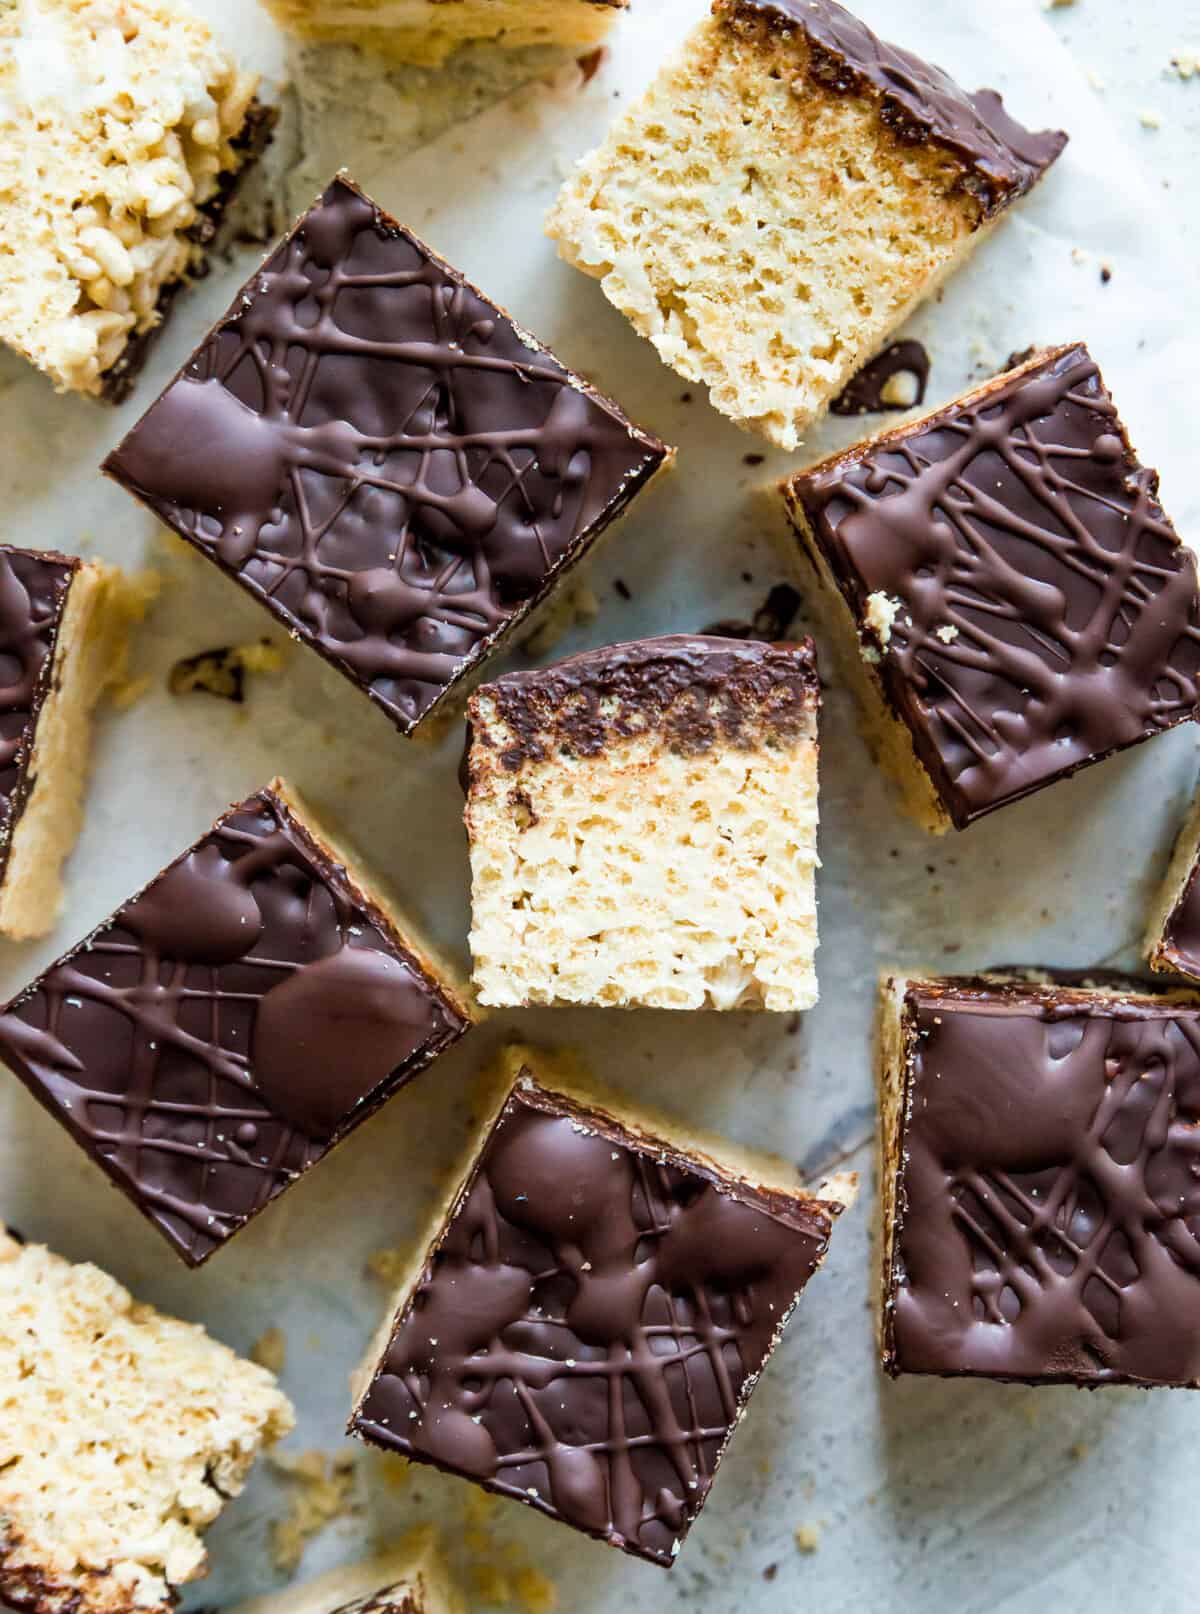
Step eight:
Now cut the treats into pieces and enjoy!
Top tips:
- Heat the butter and marshmallows over low heat. If you try using high heat, the rice crispy treats will turn out hard, rather than soft and gooey.
- Be sure to stir the marshmallows regularly while they are melting so that they don't burn or stick to the bottom of the pan.
- I recommend using salted rather than unsalted butter for this recipe.
- Don’t press the rice krispie mixture into the pan too firmly. If you do the squares will turn out more hard. The key is to gently press the mixture into the pan, just until it’s even.
- Use a hot knife to make cutting these cereal bars even easier.
Recipe variations and add ins:
- To make these Rice Krispie treats gluten-free: use gluten-free Rice Krispies or another gluten free rice crisps cereal.
- To make this dessert recipe dairy free or vegan: use a vegan butter, vegan marshmallows, and dairy free chocolate.
- You can use dark chocolate, white chocolate or milk chocolate to make these chocolate Rice Krispie squares.
- To add even more flavour and crunch, top the chocolate with ground almonds or other ground nuts.
- To give this dessert a different flavour use vanilla marshmallows or add a pinch of salt or sea salt.
How to store:
Store these treats in an airtight container at room temperature for up to 3 days. To help keep them soft, place a sheet of wax paper in between each layer to prevent them from sticking together, then seal the top of the container.
You can also freeze this dessert. To do so, place them in an airtight container or bag and use parchment or wax paper to separate each layer. They can be frozen for up to 3 months.
Frequently asked questions:
Rice Krispie Treats can be store for up to 3 days at room temperature, but they are best if eaten within 24 hours of being made.
Yes you can. The best way to freeze them is to store them in an airtight container, with wax paper between each layer. You can freeze them for up to 3 weeks.
If you heat the marshmallows over high heat they will make your rice crispy squares hard. Be sure to use low heat to make them soft and gooey.
Other recipes you will love:
- Dairy Free Brownies with Caramel
- Gluten Free Chocolate Chip Banana Bread
- Chocolate Avocado Torte
- Chocolate Raspberry Cups
- Carrot Cake Donuts
- Edible Cookie Dough
- 3 Ingredient Mug Cake
Since you made it this far we are basically best friends so be sure to follow me on Instagram, Pinterest, TikTok and Facebook where I share even more recipes and healthy living tips! And don’t forget to leave this recipe a star review before you go!
Recipe

Chocolate Covered Rice Krispie Treats
Equipment
- 8 inch square pan
Ingredients
- 1/3 cup salted butter
- 15 oz mini marshmallows
- 1 teaspoon vanilla extract
- 4 cups Rice Krispies cereal
Chocolate Coating
- 6 oz chocolate
Instructions
- Line an 8" x 8" baking pan with parchment paper.
- Melt the butter over low heat in a large pot, stirring regularly to prevent the butter from burning.
- Once the butter has melted, add the marshmallows and vanilla extract to the pot. Stir the mixture until the marshmallows are completely melted, stirring frequently to prevent burning.
- Remove the pot from the heat and fold in the cereal. Make sure each piece of cereal is coated with the marshmallow mixture.
- Transfer the mixture to the prepared baking pan. Gently spread the mixture to fit the pan and press it down lightly so you have an even layer.
- Put the chocolate in a microwave safe bowl or dish, and heat it on high for 30 second intervals until melted.
- Pour the melted chocolate over the Rice Krispie treats and then transfer the pan to the fridge for 45 minutes to let the chocolate harden, or let them set for 2 hours at room temperature instead.
- Cut the treats into pieces and enjoy!
Notes
- Nutritional values are an estimate and will vary depending on the exact ingredients used.
- Store these treats in an airtight container at room temperature for up to 3 days or in the fridge for up to 7 days.


Leave a Reply