


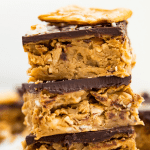
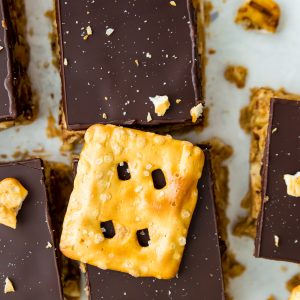
These peanut butter pretzel bars are the perfect combination of salty and sweet and are super easy to make. You’ll love that this no bake dessert only requires 5 ingredients to make and these bars are ready in just 30 minutes!

Would you like to save this for later?
Table of Contents
Why you will love this recipe:
- The taste! These bars are thick and chewy and the flavour combination of salty pretzels, creamy peanut butter, and sweet dark chocolate blend perfectly to give these bars the best taste.
- These bars are so quick and easy to make - they are ready in just 30 minutes!
- These homemade dessert bars are made with just 5 ingredients!
- Kid's love this no bake dessert.
- They store really well and freeze well so are great for meal prep.
- This recipe can easily be made vegan, dairy-free, paleo and gluten-free!
If you love pretzel desserts you will love my pretzel and caramel chocolate bars.
Ingredients and substitutions:
- Pretzels - I went with gluten-free pretzels but you can use any type of pretzels that you like for making these pretzel bars.
- Natural, smooth peanut butter - The peanut butter helps bind the pretzels together and give these bars the best flavour. Be sure to use unsweetened, smooth peanut butter. If you can't have peanut butter you can also use almond butter, sunflower seed butter or cashew butter too.
- Maple syrup - This is used to naturally sweeten this dessert while keeping it refined sugar free.
- Vanilla extract - to help enhance all the delicious flavours of these bars.
- Dark chocolate - you can use either dark chocolate bars or dark chocolate chips for making the chocolate layer on these bars.
How to make (step-by-step):
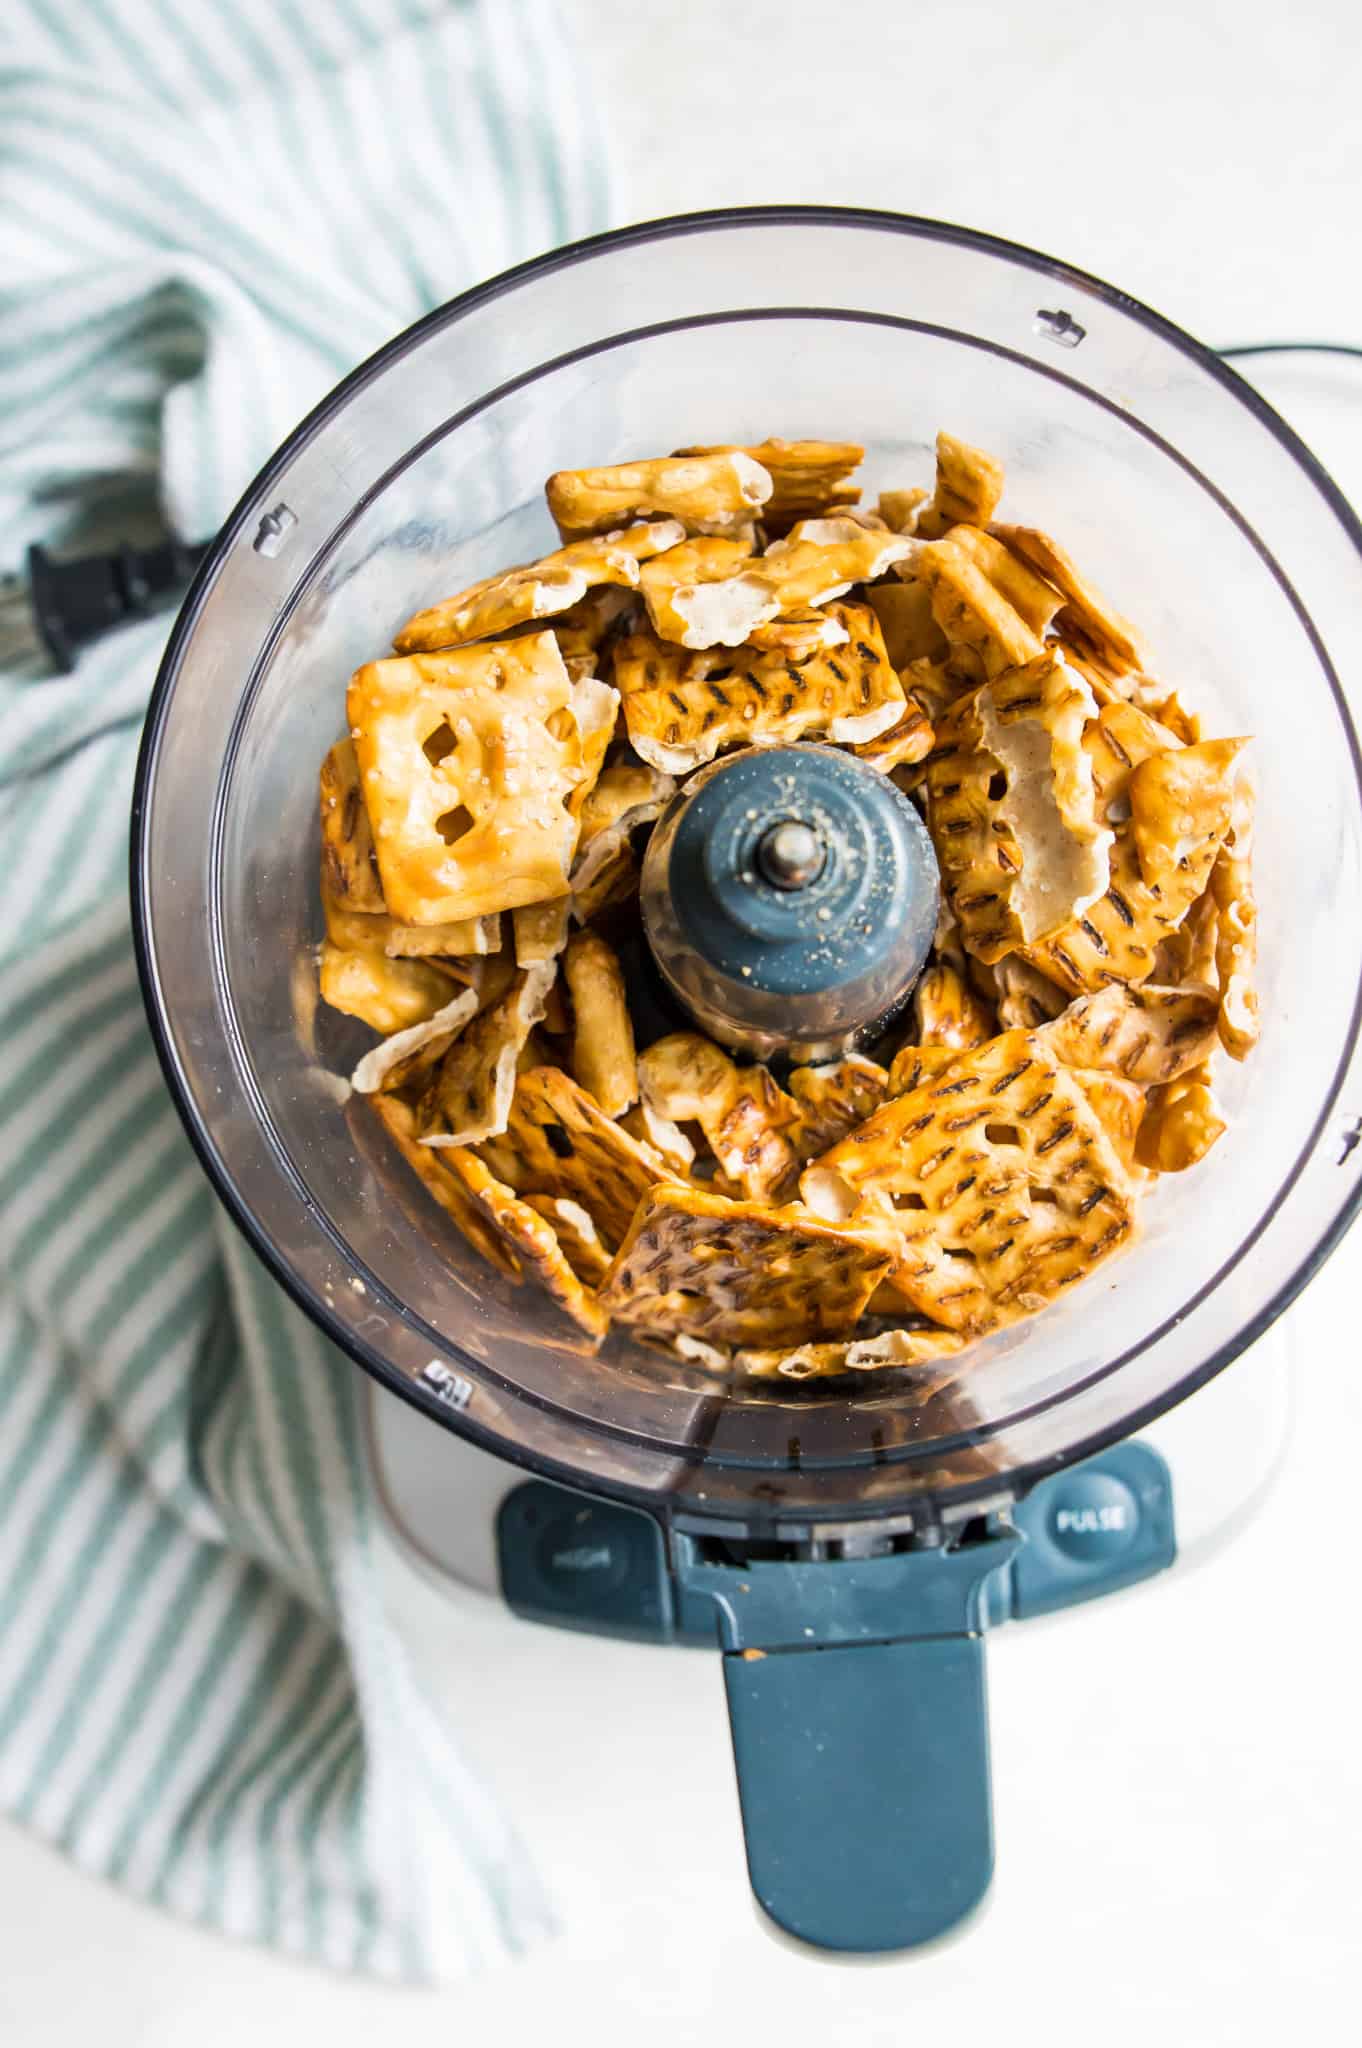
Step one:
First, add the pretzels to the food processor and process until the pretzels reach the consistency you prefer.
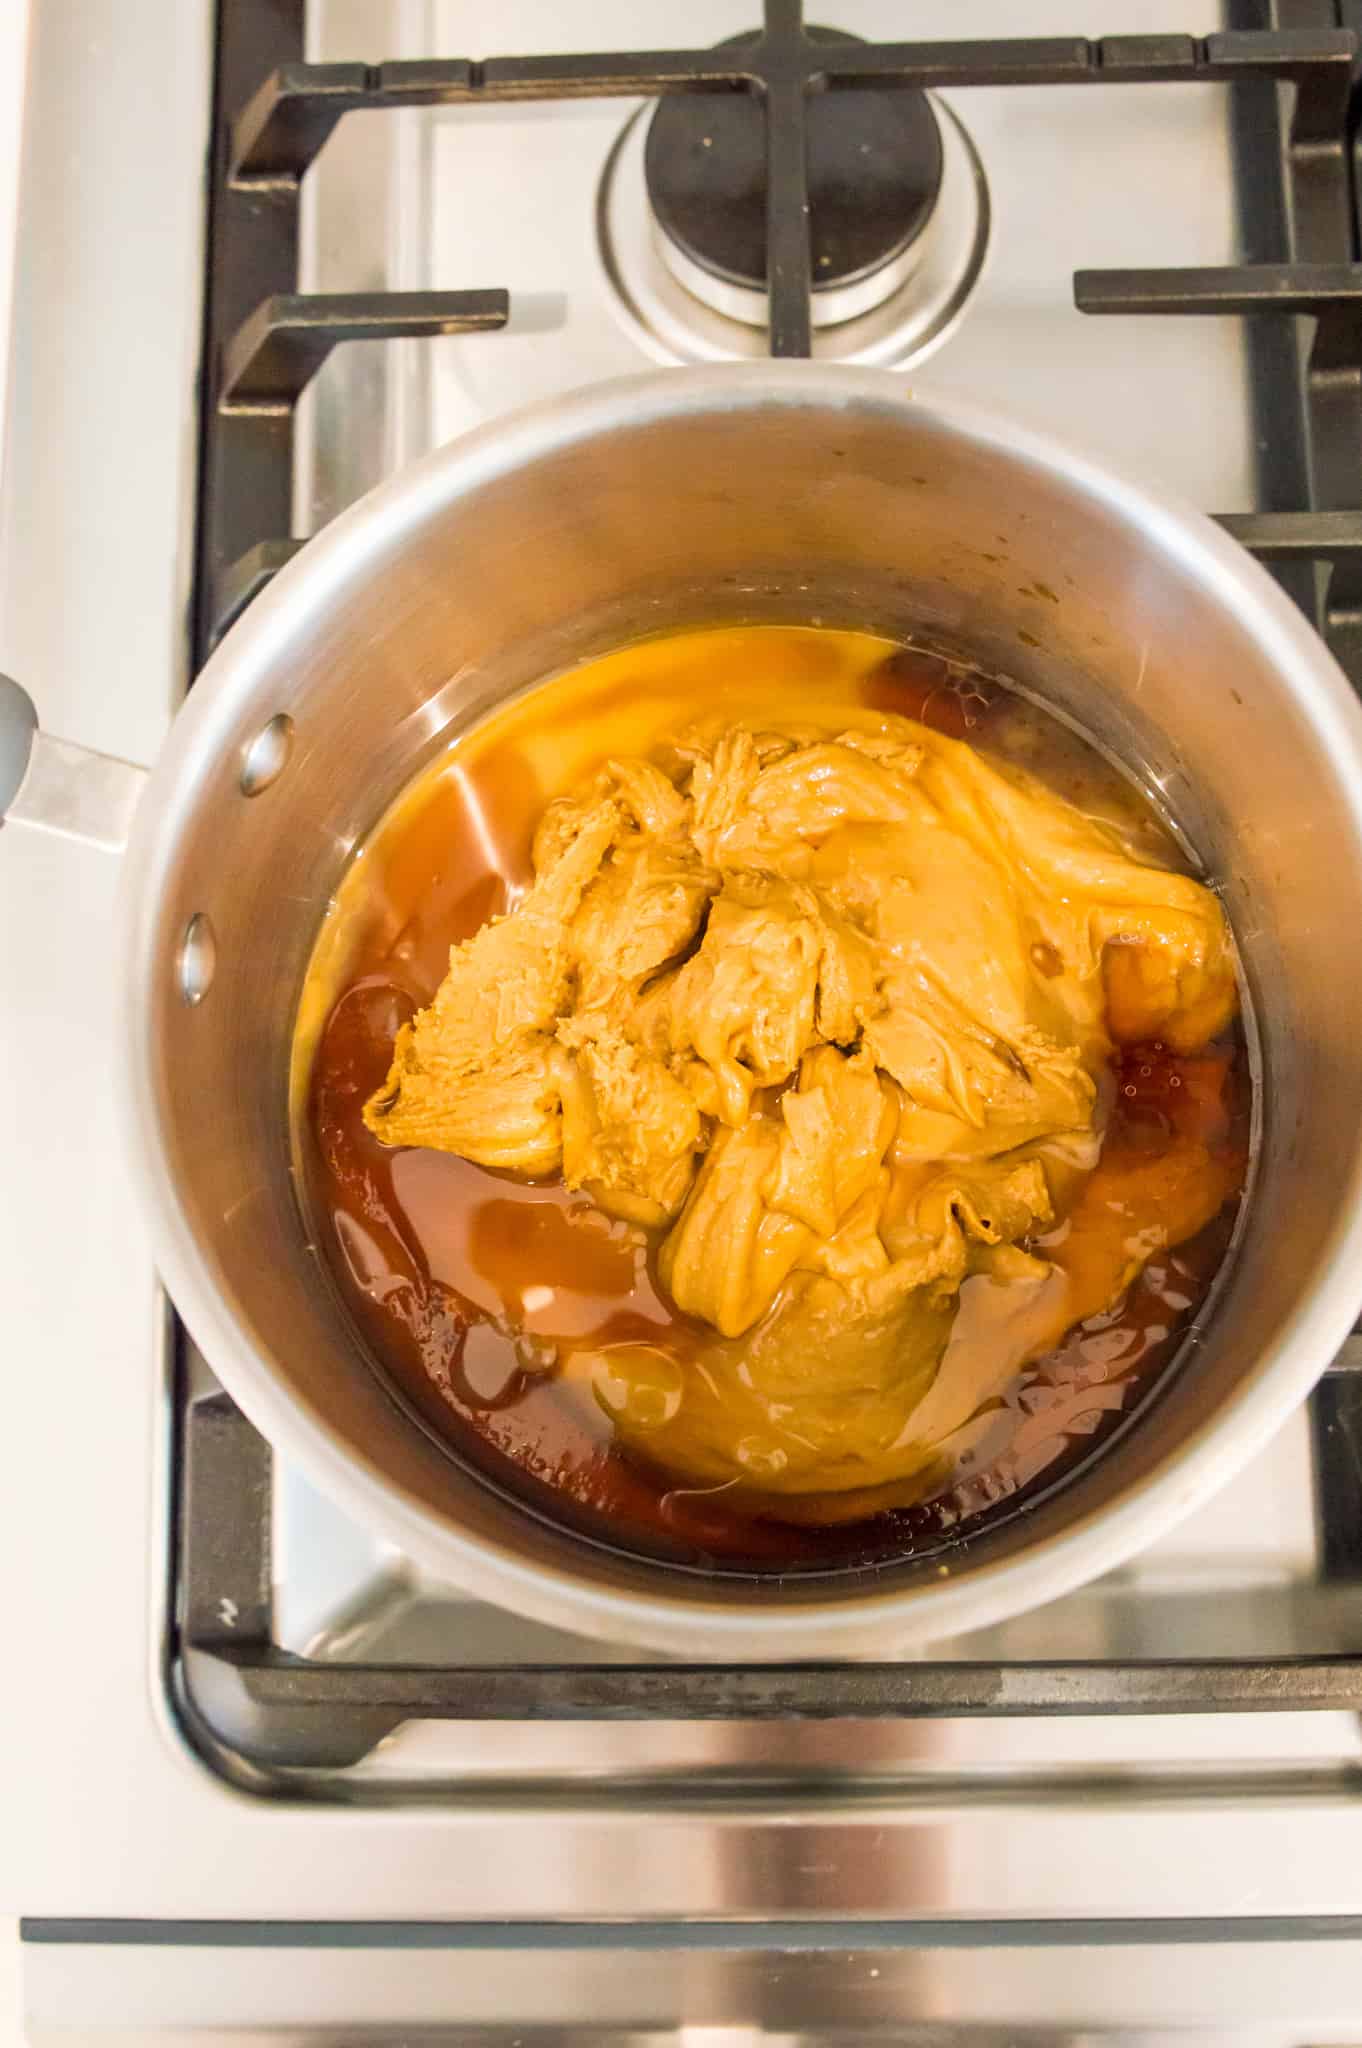
Step two:
Next put a small pot on the stove top and add the peanut butter, maple syrup, and vanilla extract. Heat for a brief period, stirring constantly until the ingredients are well combined and reach a smooth texture.
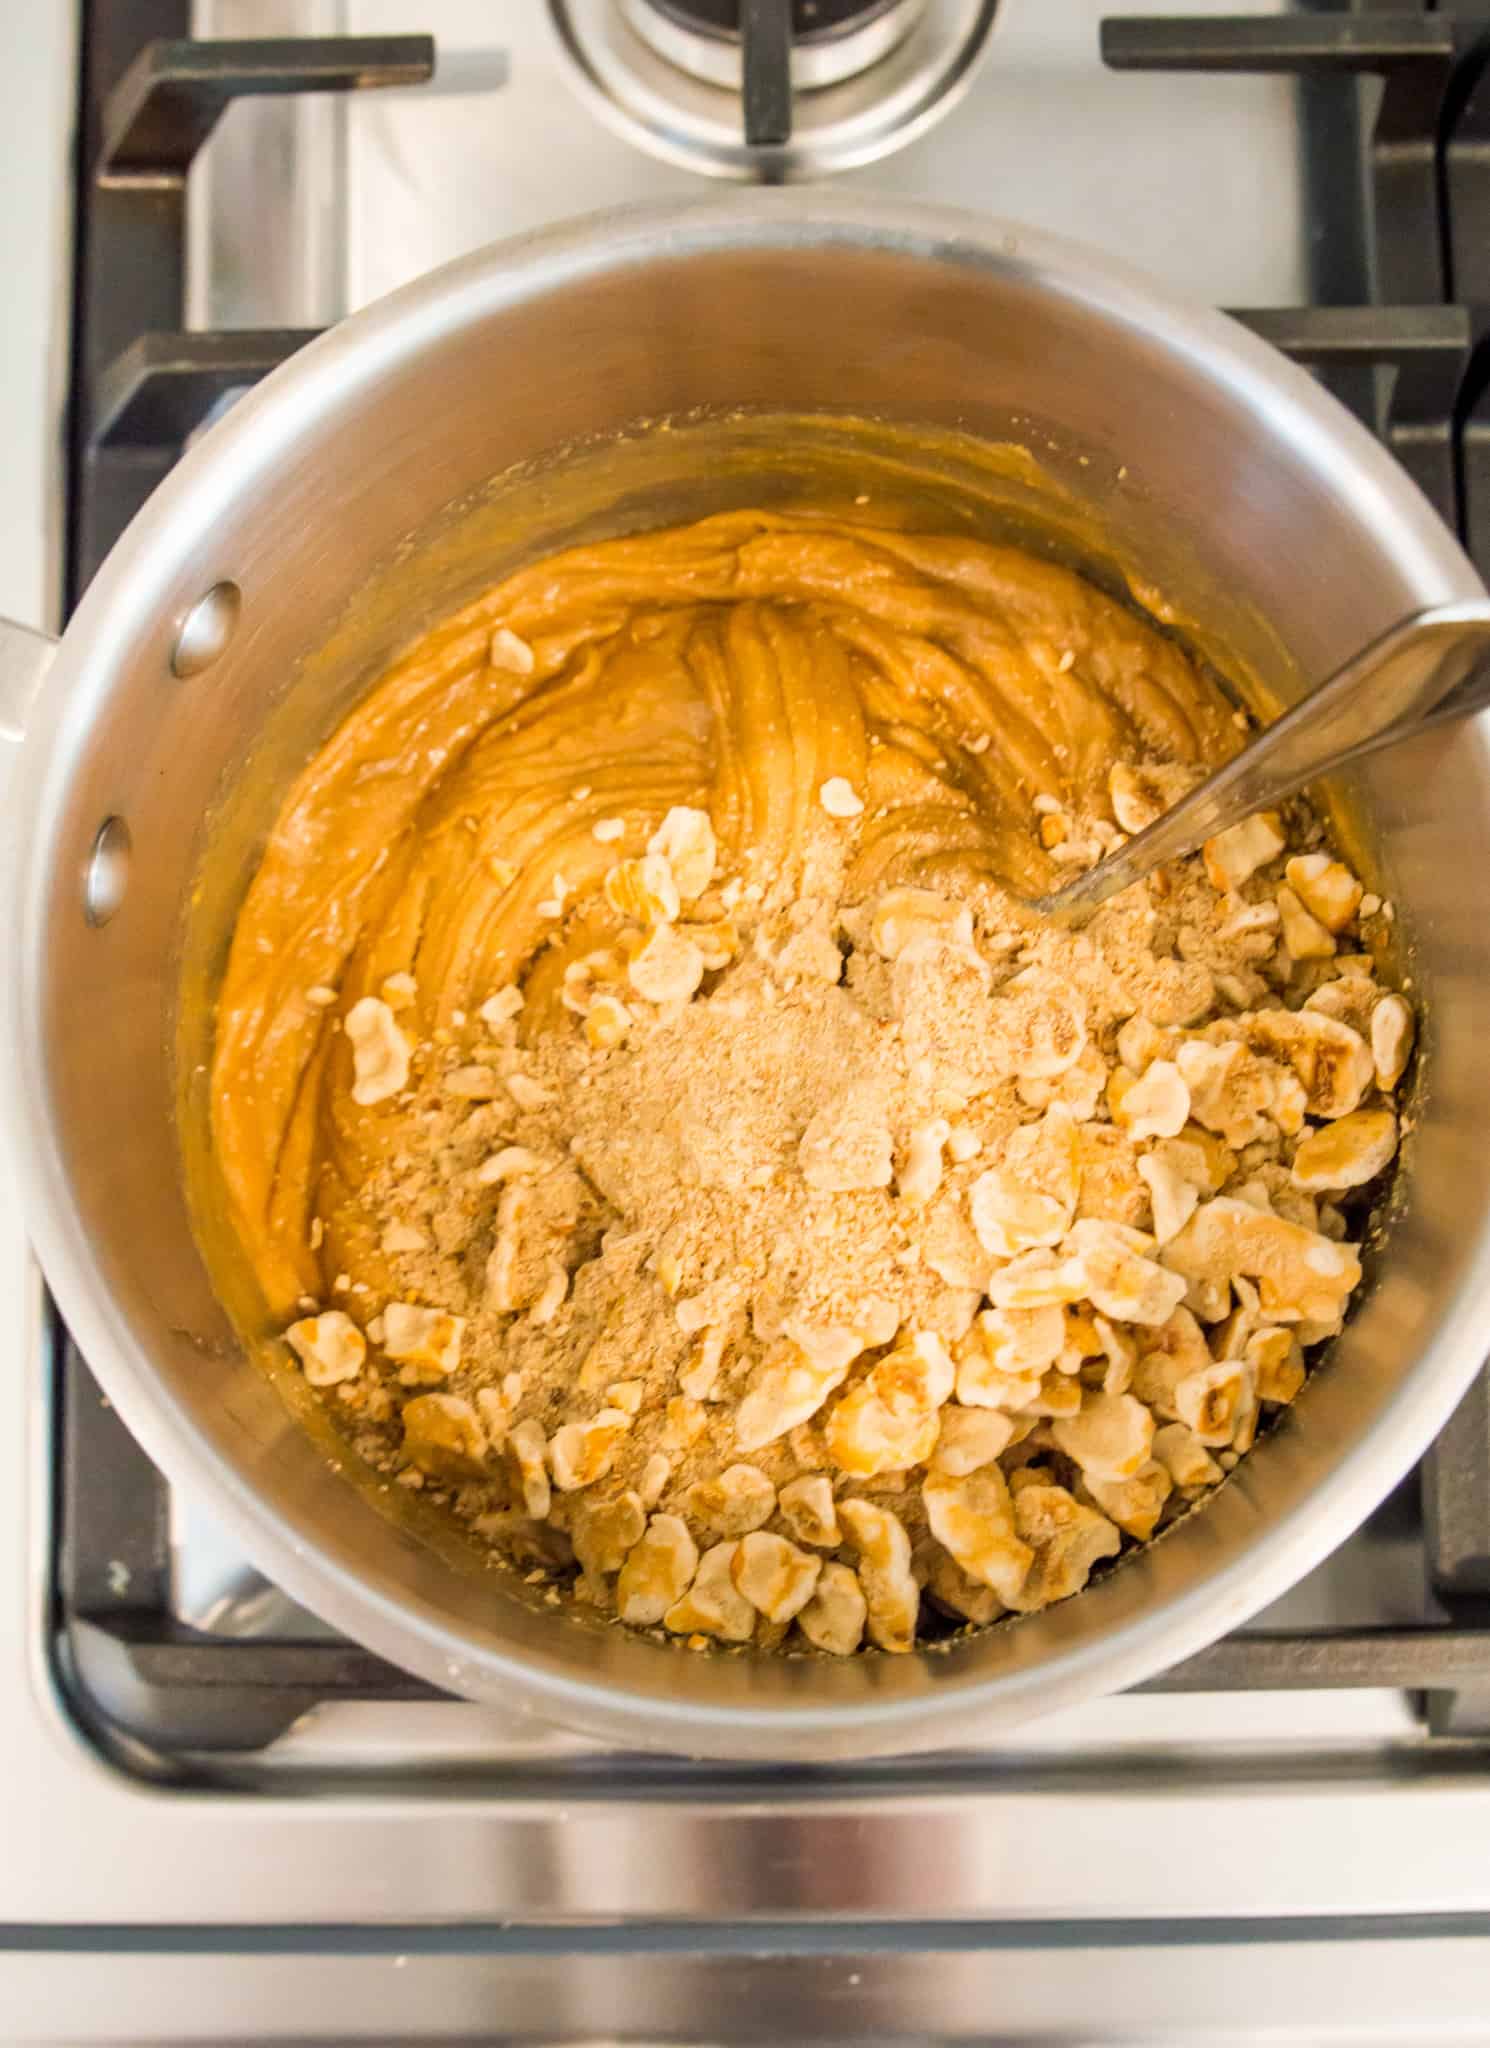
Step three:
Turn the heat off and stir in the pretzel pieces.
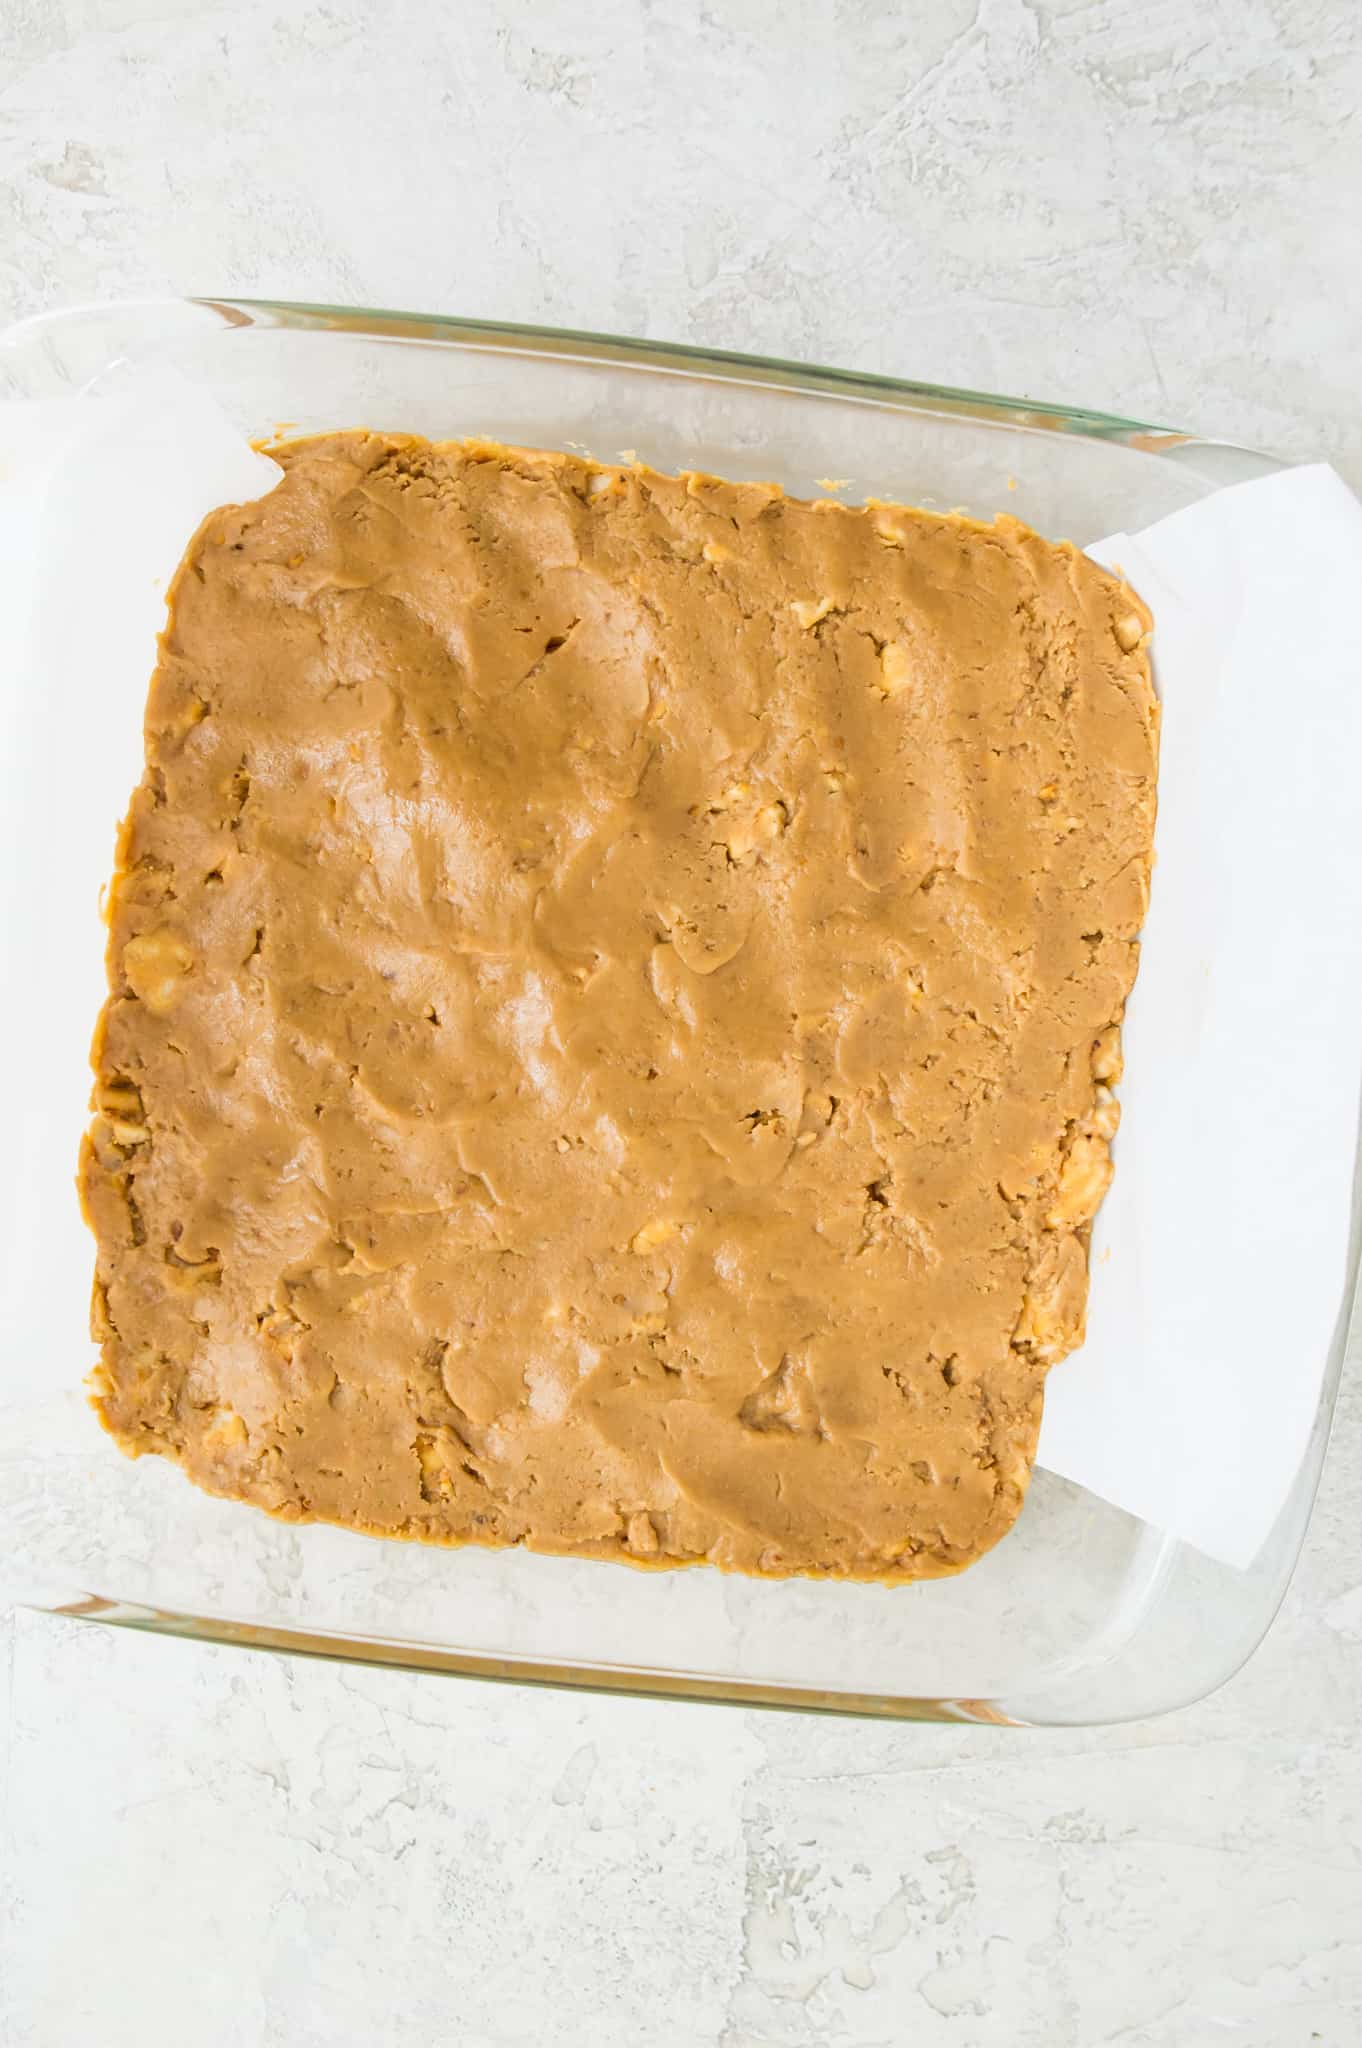
Step four:
Now line an 8" x 8" pan with parchment paper and pour the peanut butter mixture into the pan. Spread the mixture into an even layer.
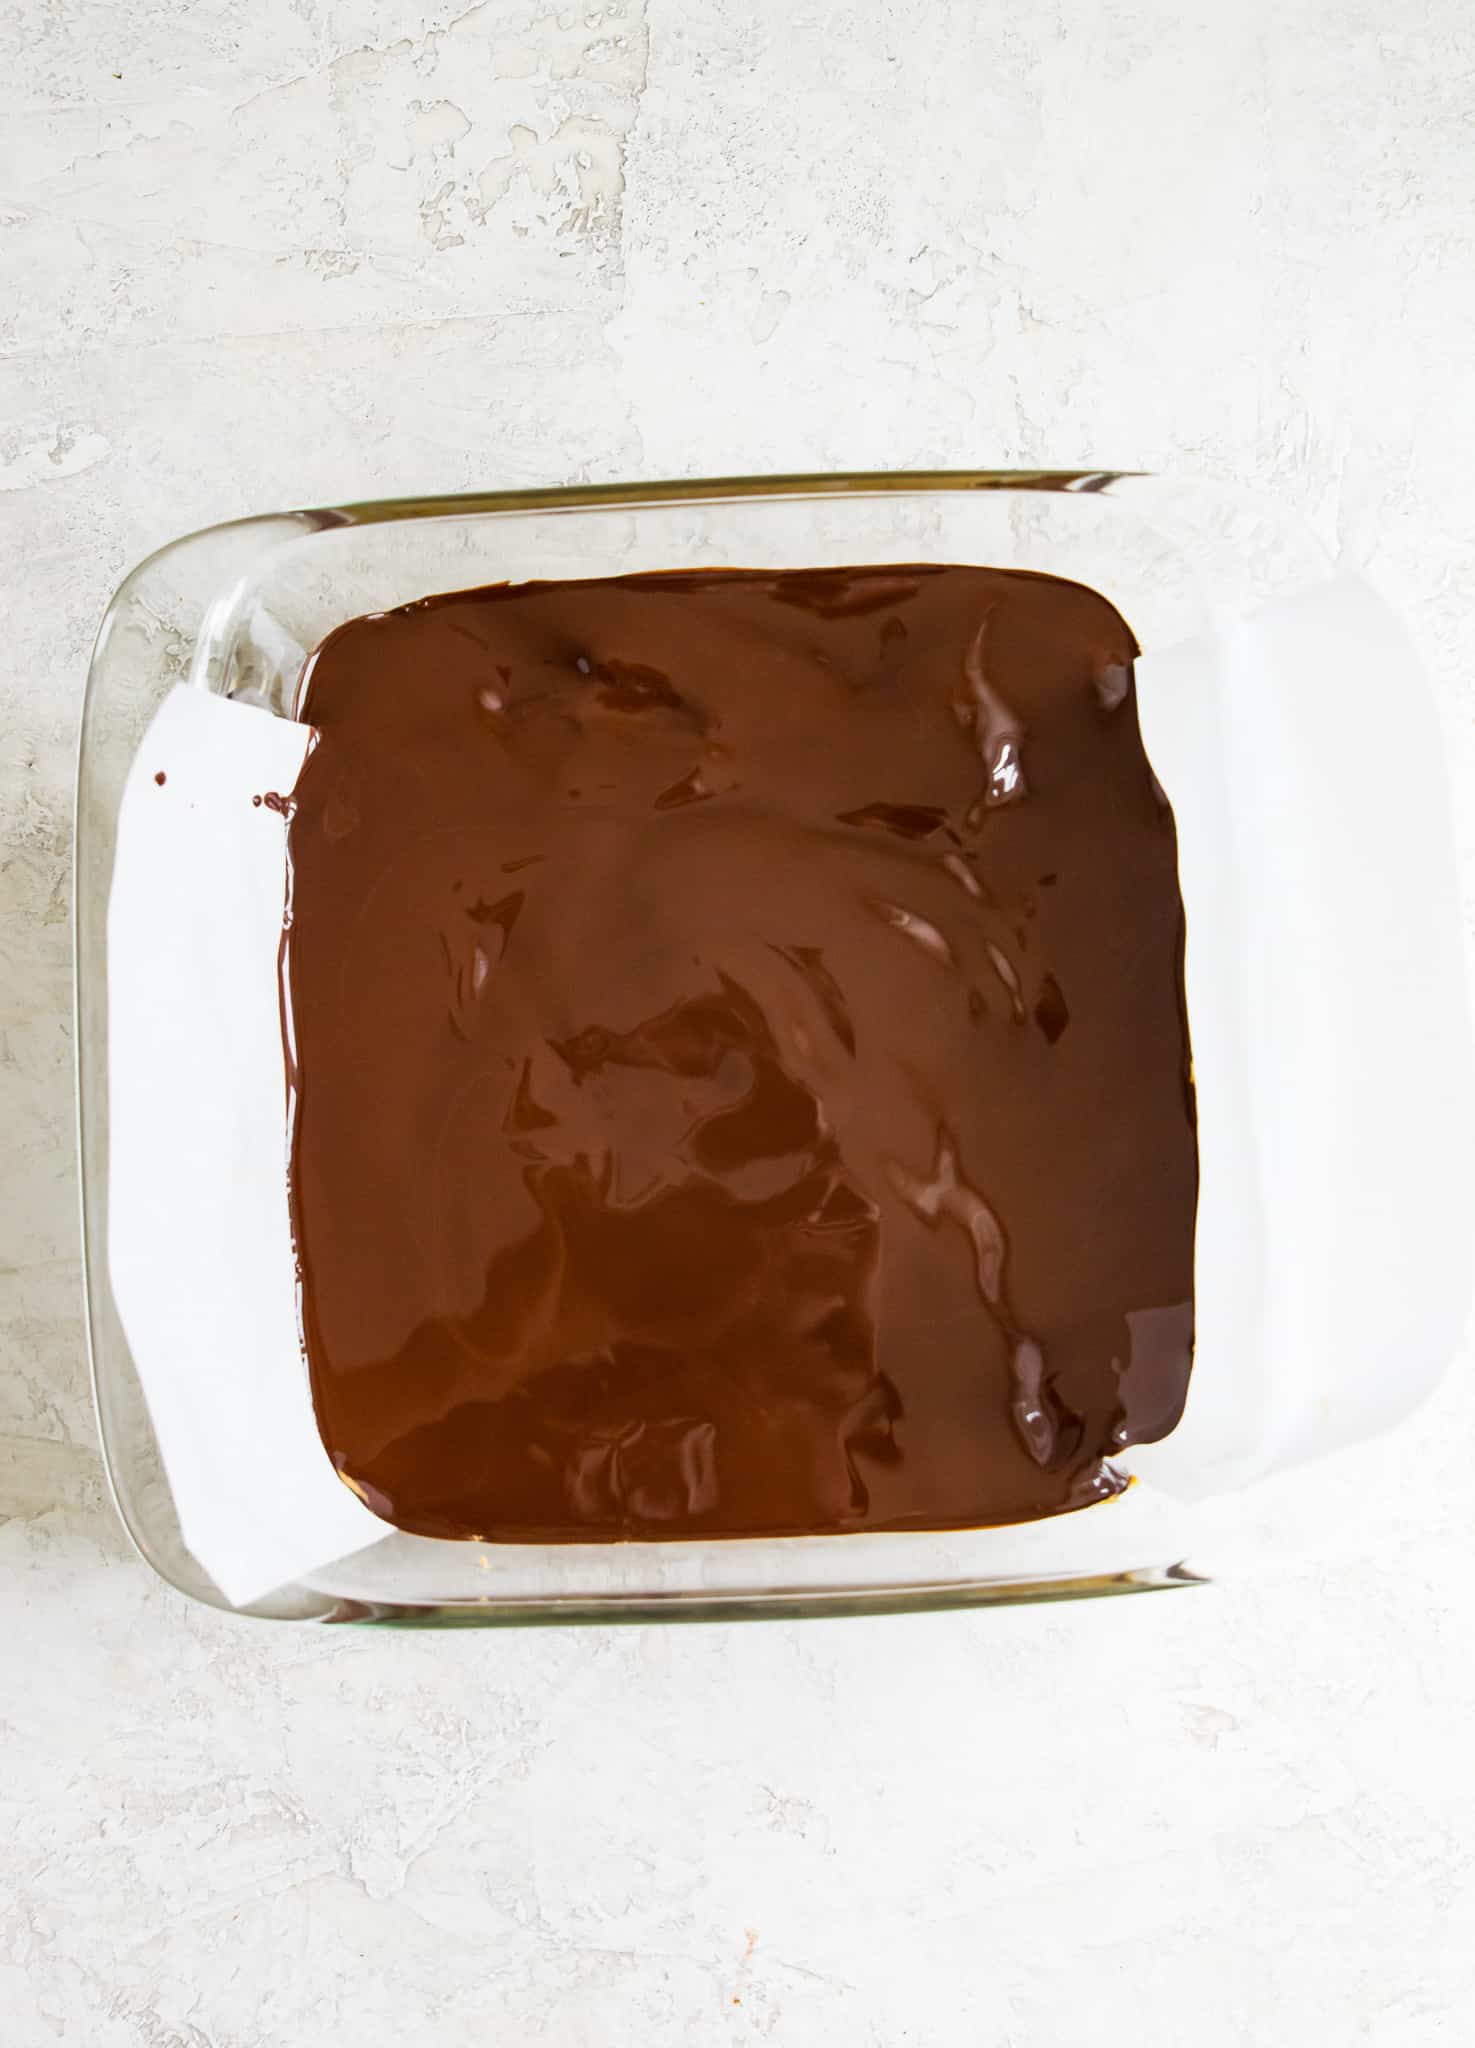
Step five:
Next melt the chocolate in the microwave by heating it on high in 30 second intervals until it's melted. Then pour the melted chocolate over the peanut butter mixture and spread it into an even layer.
Step six:
Lastly, put the dessert in the freezer for 30 minutes, then remove and cut into bars.
Top tips:
- Be sure to use unsweetened or natural peanut butter (the bars would be way too sweet if you used sweetened peanut butter).
- Use a hot knife to cut these bars into pieces more easily (I simply run the blade under hot water and then dry it off).
Variations and add ins:
- To make these bars paleo: swap the peanut butter for another nut butter such as cashew butter or sunflower seed butter, use grain free pretzels, and use dairy free, soy free chocolate.
- To make these bars gluten-free: use gluten-free pretzels.
- Make these pretzel bars vegan: use dairy-free chocolate.
- To keep these bars refined sugar free use chocolate bars sweetened with coconut sugar - my favourite brands are Hu Kitchen and Zazubean.
- Instead of chocolate bars you could use chocolate chips to make the chocolate layer.
- If you can't have peanut butter: use another nut or seed butter such as cashew butter, almond butter or sunflower seed butter.
- To add some extra crunch: sprinkle some crushed peanuts on top of the chocolate layer while it is still warm.
How to store:
Store these bars in the fridge in an airtight container for up to 7 days.
These bars also freeze really well in an airtight container or freezer bag for up to 3 months.

Frequently asked questions:
If you can't have peanut butter I would make these bars with cashew butter or sunflower seed butter instead.
You could use a blender or break up the pretzels by hand. If I were to break the pretzels up by hand I would put them in a bag and use a rolling pin to break them up.
Although I recommend using maple syrup, you could use a variety of other sweeteners. You could try using honey, brown sugar syrup or agave nectar.
Yes! As long as you use vegan chocolate this is a vegan dessert recipe.
Other desserts you will love:
- Peanut butter fudge
- Lemon Bars with Cranberry
- Easy Apple Pie Bars
- Gluten-Free Peanut Butter Oatmeal Cookies
- Nut Butter and Chocolate Crunch Bars
- Turtle Bars
- Berry Ice Cream Bars
Since you made it this far we are basically best friends so be sure to follow me on Instagram, Pinterest, TikTok and Facebook where I share even more recipes and healthy living tips! And don’t forget to leave this recipe a star review before you go!
Recipe
Peanut Butter Pretzel Bars
Equipment
- 8 inch square baking dish
Ingredients
- 156 grams pretzels (or 5.5 ounces)
- 1 jar natural smooth peanut butter (500 grams)
- 1/2 cup maple syrup
- 1 teaspoon vanilla extract
- 2 chocolate bars (6 ounces)
Instructions
- Place the pretzels in your food processor and process until you have pretzel pieces the size that you like.
- Place a pot on the stove on low heat. Add the peanut butter, maple syrup and vanilla extract. Heat for 1-2 minutes, stirring frequently until the ingredients are combined and smooth.
- Turn off the heat and stir in the pretzel pieces.
- Line an 8" x 8" pan with parchment paper and transfer the peanut butter pretzel mixture to the pan. Spread it out evenly with a spoon or knife.
- Melt the chocolate bars in a microwave safe dish by heating them on high in 30 second intervals, until melted.
- Pour the melted chocolate onto the peanut butter pretzel layer and spread it evenly until smooth. Place the pan in the freezer for 20-30 minutes until the chocolate is set. Remove the pan from the freezer and cut the bars into pieces.
Notes
- Use a hot knife to cut the bars into pieces more easily.
- Instead of using chocolate bars you could use chocolate chips to make the chocolate layer.
- Nutritional values are an estimate and will vary depending on the specific ingredients you use.


Leave a Reply