• Skip to primary navigation
  • Skip to main content
  • Skip to primary sidebar
Pure and Simple Nourishment
  • About
    • Meet Dr. Erin Carter
    • My Food Philosophy
    • Press and Publications
    • Contact
  • Free Resources
  • Recipes
    • Holidays
      • Fall
      • Thanksgiving
      • Christmas
    • Breakfast
    • Main Course
    • Dessert
    • Sauces and Dips
    • Side Dish
    • Drinks
    • Vegetables
    • Snack
    • Meat and Fish
    • Recipe Wrap-Ups
    • SCD
    • GAPS
    • Whole30
    • AIP
    • Vegan
    • Paleo
    • Dairy-Free
    • Gluten-Free
    • Low FODMAP
    • Refined-Sugar-Free
  • Health
    • Health Information
    • Book Club
  • Nutrition
  • Favorites
    • Books
    • Tools
    • Skincare
  • Work With Me
    • Services
    • Skin Care Quiz
    • Contact
  • Skin Care
  • Weekly Workouts
menu icon
go to homepage
  • Summer
  • Recipes
  • Health Information
  • Meet Dr. Erin Carter
  • Services
    • Facebook
    • Instagram
    • Pinterest
    • TikTok
  • subscribe
    search icon
    Homepage link
    • Summer
    • Recipes
    • Health Information
    • Meet Dr. Erin Carter
    • Services
    • Facebook
    • Instagram
    • Pinterest
    • TikTok
  • ×
    Home » Recipes » Dessert

    The Best Chocolate Covered Rice Krispie Treats

    Modified: Nov 18, 2024 • Published: Nov 27, 2022 by Dr. Erin Carter • This post may contain affiliate links • Leave a Comment

    203 shares
    • Share
    • Tweet
    Jump to Recipe Print Recipe
    Pieces of chocolate covered Rice Krispie Treats.
    Pieces of chocolate covered Rice Krispie Treats.
    Pieces of chocolate covered Rice Krispie Treats.

    These are the best chocolate covered Rice Krispie treats! They are soft, chewy and perfectly sweet. And this homemade dessert is so easy to make and you only need 5 ingredients to make it.
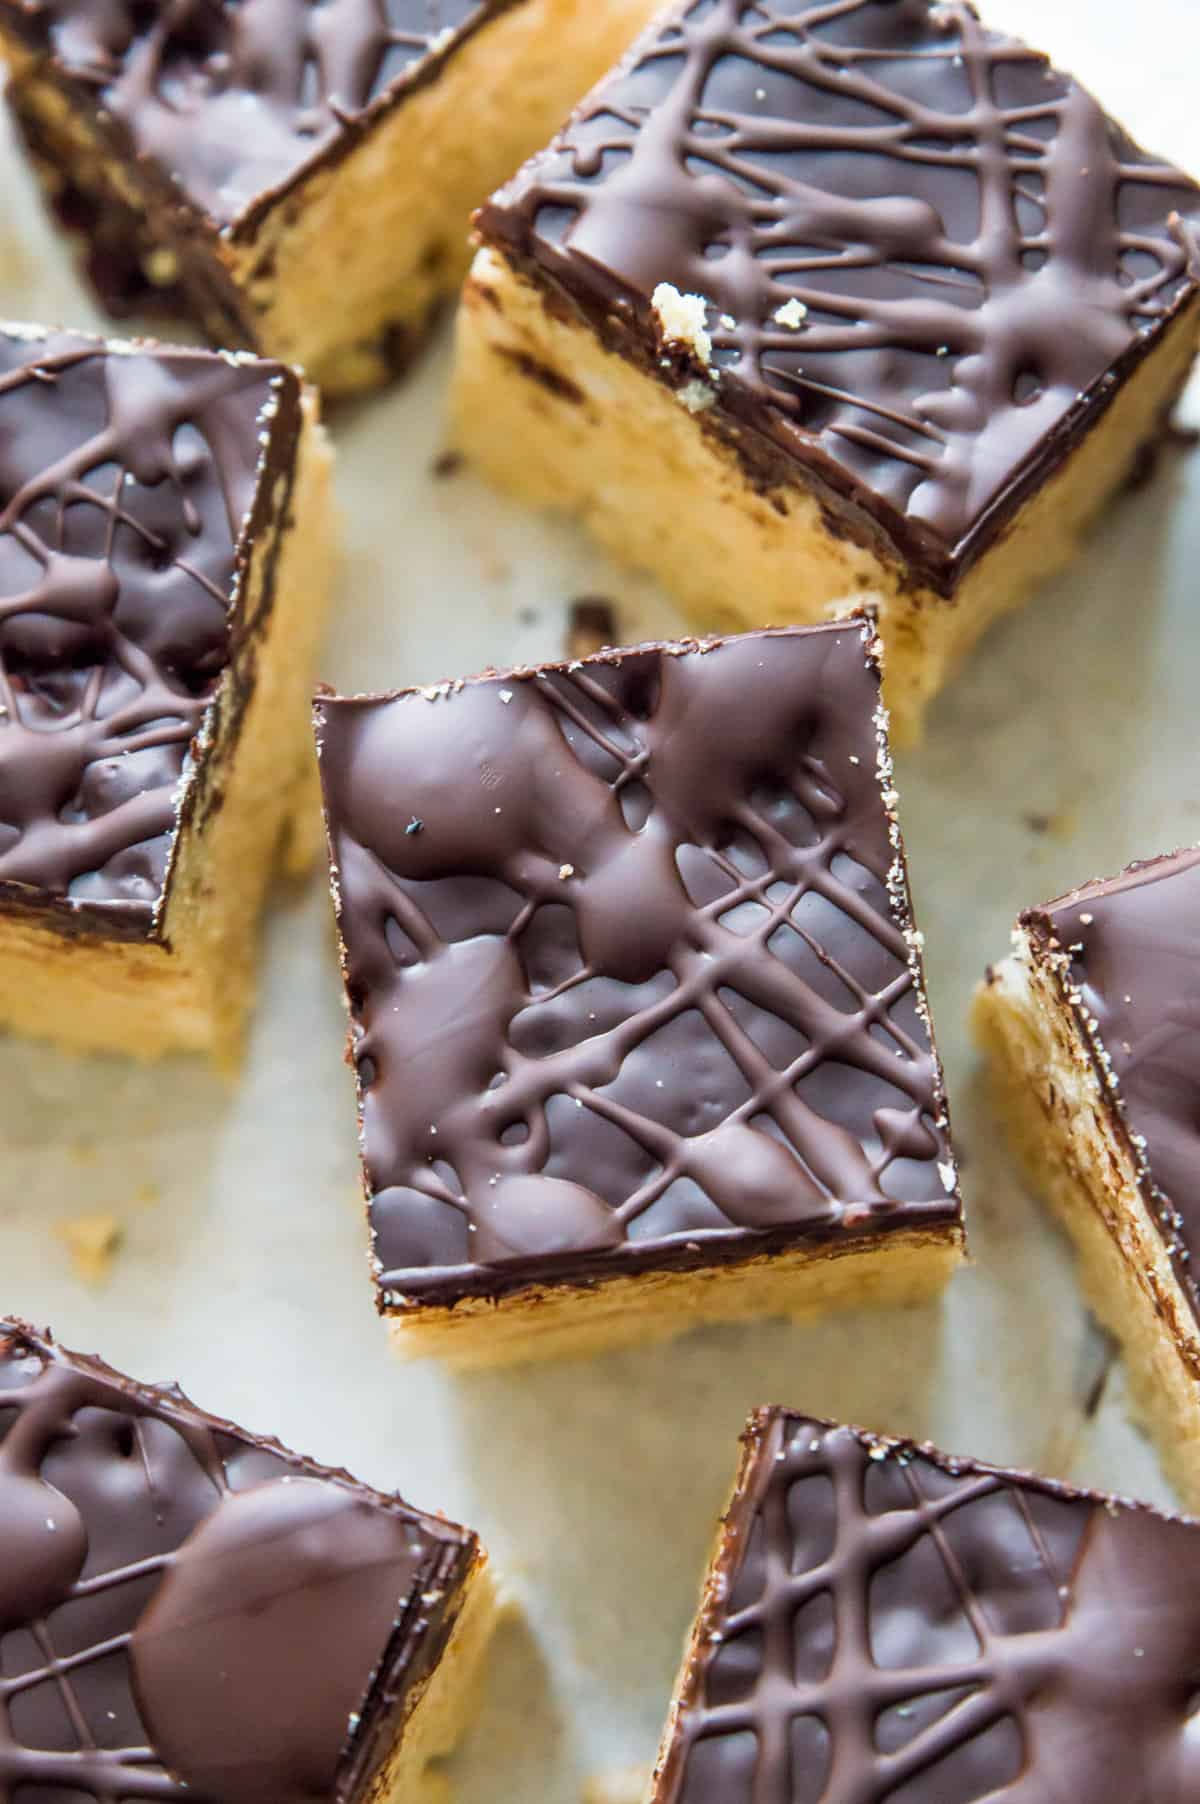
    Pieces of chocolate covered Rice Krispie Treats.

    If you love no bake desserts like the best no bake peanut butter fudge, peanut butter and chocolate pretzel bars and peanut butter chocolate bliss balls then you are going to love the dessert recipe I am sharing with you today!

    Table of Contents
    • Why you will love this recipe:
    • Ingredients and substitutions:
    • Recipe variations and add ins:
    • How to make chocolate covered Rice Krispie Treats:
    • Top tips:
    • How to store:
    • Chocolate covered Rice Krispie treats FAQs:
    • Other chocolate treats you will love:
    • Recipe

    Why you will love this recipe:

    • The flavour! They are sweet and gooey on the inside, yet nice and crispy on the outside. The dark chocolate coating contrasts perfectly with the sweet marshmallow filling and helps make this dessert even more decadent.
    • This no bake dessert is so quick and easy to make and only requires a few minutes of hands on time plus you only need five ingredients to make these homemade Rice Krispie squares.
    • You can easily make this dessert gluten-free, dairy-free or vegan, just like chocolate covered espresso beans.
    • Kids love this dessert and they can help you make it!
    • You can serve this no bake dessert any time, but it's also a great option for holidays like Valentine's Day, birthday parties or Christmas.

    If you love rice krisp treats you will also love Pumpkin Rice Krispie Treats and peanut butter and chocolate Rice Krispie Treats.

    Ingredients and substitutions:

    The ingredients needed to make chocolate covered rice krispie treats, separated into bowls including rice crisps cereal, chocolate, butter and marshmallows.
    • Rice Krispies cereal - you can use Kellogg's Rice Krispies or another brand of rice crisps cereal or rice krispie cereal.  
    • Marshmallows - you want to use mini marshmallows. It's also best to use fresh marshmallows. If the marshmallows are stale they won't melt as well and so the squares will turn out harder, rather than soft and chewy.
    • Salted butter - to help make this treat extra soft and gooey. If you are dairy-free or vegan use a dairy-free salted butter or vegan butter.
    • Vanilla extract - to help enhance all the delicious flavours of this dessert.
    • Chocolate - chocolate is what takes this dessert to the next level. I prefer to use dark chocolate but you can use any type of chocolate that you like. You can use any type of chocolate that will melt including chocolate bars, chocolate chips or baking chocolate.

    Recipe variations and add ins:

    • To make these Rice Krispie treats gluten-free: use gluten-free Rice Krispies or another gluten free rice crisps cereal.
    • To make dairy free or vegan: use a vegan butter, vegan marshmallows, and dairy free chocolate. 
    • To add even more flavour and crunch, top the chocolate with nuts such as sliced almonds, or crushed pecans or walnuts.
    • To give this dessert a different flavour use vanilla marshmallows or add some flaky sea salt to the top of the chocolate.
    • Change up the chocolate: instead of dark chocolate you could use milk chocolate or white chocolate depending on your preference.

    How to make chocolate covered Rice Krispie Treats:

    Butter melting in a pot on the stovetop.

    Step 1

    First, line an 8" x 8" baking pan with parchment paper and melt the butter over low heat in a large pot on the stovetop, stirring regularly to prevent the butter from burning.

    A pot on the stovetop with mini marshmallows and melted butter in it.

    Step 2

    Once the butter has melted, add the marshmallows and vanilla extract to the pot. Stir the mixture until the marshmallows are completely melted, stirring frequently to prevent burning.

    A pot filled with rice crisps cereal coated in melted marshmallows.

    Step 3

    Now remove the pot from the heat and fold in the cereal. Try to make sure that each piece of cereal is coated with the marshmallow mixture.

    A glass baking pan filled with a mixture of cereal and melted marshmallows.

    Step 4

    Then transfer the cereal mixture to the prepared baking pan. Gently spread the mixture to fit the pan and press it down lightly so you have an even layer.

    A glass measuring cup with melted chocolate in it.

    Step 5

    Put the chocolate in a microwave-safe bowl or dish, and heat it on high for 30 second intervals until melted.

    A pan filled with Rice Krispie treats covered in melted chocolate.

    Step 6

    Pour the melted chocolate over the Rice Krispie treats and spread the chocolate evenly so you have a smooth layer. Then transfer the pan to the fridge for 20-30 minutes to let the chocolate harden, or let them set for 1 hour at room temperature instead. 

    A batch of Rice Krispie Treats covered in chocolate cut into squares.

    Step 7

    Now cut the treats into pieces and enjoy!

    Top tips:

    • Heat the butter and marshmallows over low heat. If you try using high heat, the rice crispy treats will turn out hard, rather than soft and gooey.
    • Be sure to stir the marshmallows regularly while they are melting so that they don't burn or stick to the bottom of the pan.
    • I recommend using salted rather than unsalted butter for this recipe.
    • Don’t press the rice krispie mixture into the pan too firmly. If you do the squares will turn out more hard. The key is to gently press the mixture into the pan, just until it’s even.
    • Use a hot knife to make cutting these cereal bars even easier.
    • To turn these into Rice Krispie treats on a stick, after you have cut the dessert into squares, place a stick into the bottom of each square.

    How to store:

    Store these treats in an airtight container at room temperature for up to 3 days. To help keep them soft, place a sheet of wax paper in between each layer to prevent them from sticking together, then seal the top of the container.

    You can also freeze this dessert. To do so, place them in an airtight container or bag and use parchment or wax paper to separate each layer. They can be frozen for up to 3 months.
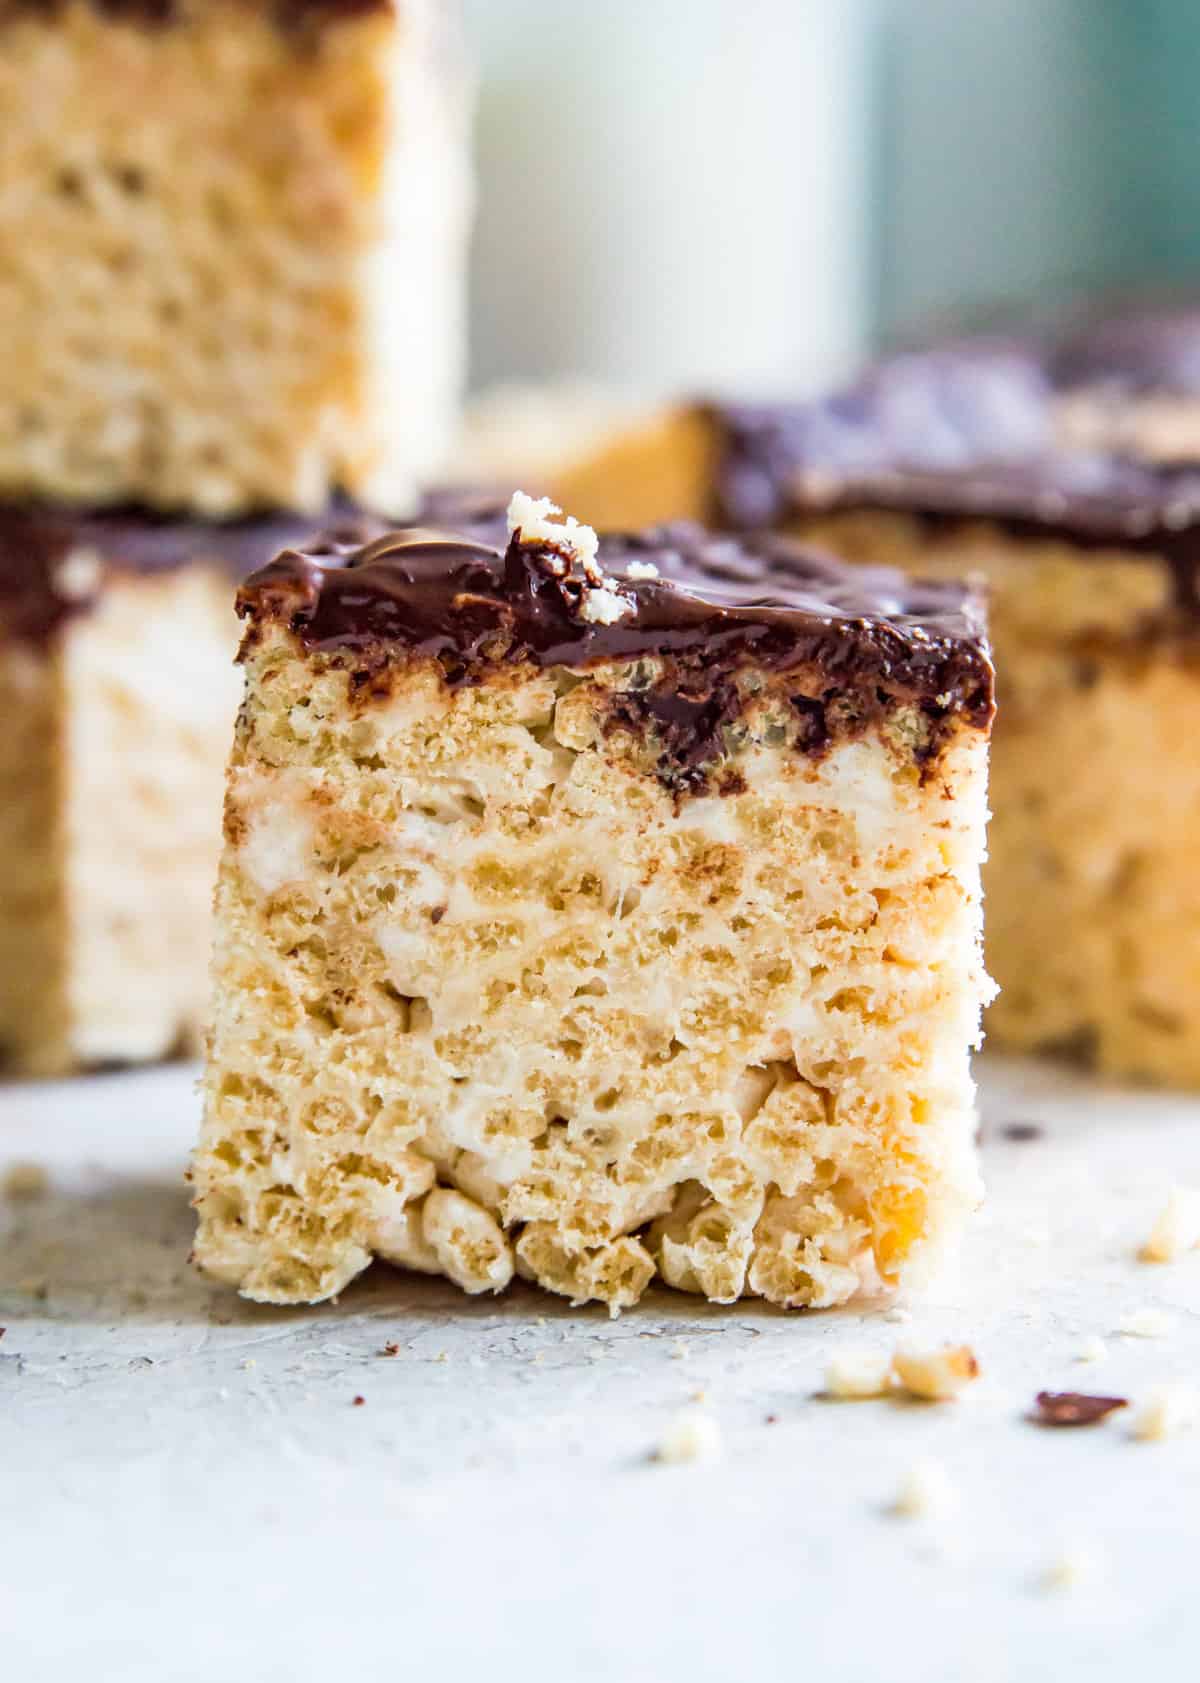
    A chocolate covered Rice Krispie square.

    Chocolate covered Rice Krispie treats FAQs:

    How far in advance can you make chocolate covered Rice Krispie treats?

    Rice Krispie Treats can be store for up to 3 days at room temperature, but they are best if eaten within 24 hours of being made.

    Can you freeze these Rice Krispie treats?

    Yes you can. The best way to freeze them is to store them in an airtight container, with wax paper between each layer. You can freeze them for up to 3 months.

    Why are my Rice Krispie treats so hard?

    If you heat the marshmallows over high heat they will make your rice crispy squares hard. Be sure to use low heat to make them soft and gooey.

    Other chocolate treats you will love:

    • One large piece of a dairy free brownie with caramel drizzled on it.
      The Best Dairy-Free Brownies with Caramel (gluten-free & paleo)
    • A slice of chocolate torte on a plate with a fork next to it.
      The Best No Bake Chocolate Avocado Torte
    • A mug filled a chocolate mug cake topped with vanilla ice cream.
      Easy 3 Ingredient Mug Cake (no flour)
    • A stack of five chocolate raspberry cups and the top one has a bite out of it so you can see the raspberry filling.
      Chocolate Raspberry Cups

    Since you made it this far we are basically best friends so be sure to follow me on Instagram, Pinterest, TikTok and Facebook where I share even more recipes and healthy living tips! And don’t forget to leave this recipe a star review before you go!

    Recipe

    Chocolate covered Rice Krispie Treats cut into pieces.

    Chocolate Covered Rice Krispie Treats

    You are going to love these chocolate covered Rice Krispie treats. They are so easy to make and kids love them!
    5 from 7 votes
    Print Pin Rate
    Course: Dessert
    Cuisine: American
    Diet: Gluten Free, Low Lactose, Vegan
    Prep Time: 5 minutes minutes
    Cook Time: 5 minutes minutes
    Resting time: 20 minutes minutes
    Total Time: 30 minutes minutes
    Servings: 16
    Calories: 200kcal
    Author: Dr. Erin Carter

    Equipment

    • Large pot or stockpot
    • 8 inch square pan

    Ingredients

    • 1/3 cup salted butter
    • 15 oz mini marshmallows
    • 1 teaspoon vanilla extract
    • 4 cups Rice Krispies cereal

    Chocolate Coating

    • 6 oz chocolate

    Instructions

    • Line an 8" x 8" baking pan with parchment paper.
    • Melt the butter over low heat in a large pot, stirring regularly to prevent the butter from burning.
    • Once the butter has melted, add the marshmallows and vanilla extract to the pot. Stir the mixture until the marshmallows are completely melted, stirring frequently to prevent burning.
    • Remove the pot from the heat and fold in the cereal. Make sure each piece of cereal is coated with the marshmallow mixture.
    • Transfer the mixture to the prepared baking pan. Gently spread the mixture to fit the pan and press it down lightly so you have an even layer.
    • Put the chocolate in a microwave safe bowl or dish, and heat it on high for 30 second intervals until melted.
    • Pour the melted chocolate over the Rice Krispie treats and then transfer the pan to the fridge for 45 minutes to let the chocolate harden, or let them set for 2 hours at room temperature instead.
    • Cut the treats into pieces and enjoy!

    Notes

    1. Nutritional values are an estimate and will vary depending on the exact ingredients used. 
    2. Store these treats in an airtight container at room temperature for up to 3 days or in the fridge for up to 7 days. 

    Nutrition

    Calories: 200kcal | Carbohydrates: 34g | Protein: 1g | Fat: 8g | Saturated Fat: 5g | Polyunsaturated Fat: 0.3g | Monounsaturated Fat: 2g | Trans Fat: 0.2g | Cholesterol: 10mg | Sodium: 90mg | Potassium: 42mg | Fiber: 1g | Sugar: 22g | Vitamin A: 584IU | Vitamin C: 4mg | Calcium: 5mg | Iron: 2mg
    Tried this Recipe? Pin it for Later!Mention @pureandsimpleno or tag #pureandsimpleno!

    DISCLAIMERS: The statements made on this website have not been approved by the Food and Drug Administration or Health Canada. The information is not intended to diagnose, treat, cure, or prevent disease. You assume full responsibility for how you use this information. Always consult with your physician or other health professionals before making any diet or lifestyle changes. This post may contain affiliate links whereby if you purchase these products I receive a small percentage of the sale price. This allows me to keep the blog running and I thank you for allowing me to do that!

    Reader Interactions

    Leave a Reply Cancel reply

    Your email address will not be published. Required fields are marked *

    Recipe Rating


    Primary Sidebar

    A photo of Dr. Erin Carter wearing a floral dress in her kitchen.

    Hi everyone!

    My name is Dr. Erin Carter and I am so thrilled you are here. I am a physician with specialties in both internal medicine and rheumatology, and I believe that food and healthy living are forms of medicine. In my spare time I share health information and delicious, healthy recipes here on Pure and Simple Nourishment.

    More about me

    Summer Recipes

    • A bottle of dill pickle salad dressing with cut up pickles beside it.
      Dill Pickle Salad Dressing with Pickle Juice (so easy!)
    • A lemon lavender cookie on a baking sheet with a bite out of it and surrounded by lemon slices.
      Lemon Lavender Cookies (gluten-free option)
    • Two ginger turmeric shots in glass bottles with white lids surrounded by ginger, turmeric, orange slices and lemon slices.
      Easy Lemon Ginger Turmeric Shots Recipe & Benefits (no juicer)
    • A jar of raspberry chia pudding topped with fresh raspberries and white chia seeds.
      5 Ingredient Raspberry Chia Pudding
    • A jar of chocolate orange overnight oats garnished with orange zest.
      The Best Chocolate Orange Overnight Oats
    • A bowl of coconut whipped cream.
      Easy Coconut Whipped Cream (vegan, dairy-free)

    Health Info

    • A before and after photo of keratosis pilaris with the title "how to heal keratosis pilaris with diet" over it.
      How I healed my Keratosis Pilaris with Diet
    • An arm with before and after photos of keratosis pilaris with the title "How I healed my keratosis pilaris naturally" beside it.
      How I Healed My Keratosis Pilaris (KP) Naturally
    • A blonde woman in a dress holding a tray of Beautycounter products with the title "What Happened to Beautycounter?" over her.
      What Happened to Beautycounter? The inside scoop!
    • A collage of different air fryers with the title "Non-Toxic Air Fryers" over them.
      6 Non-Toxic Air Fryers - without Teflon or PFAS (2025 Update)

    Popular Recipes

    • A paleo apple pie bar with a bite out of it and pieces of cooked apples beside it.
      Healthy Apple Pie Bars (gluten-free, vegan & paleo)
    • A gluten free burger in a bun with lettuce, tomato and ketchup.
      The Best Gluten-Free Burgers Recipe (so juicy!)
    • A loaf of gluten free chocolate chip banana bread cut into pieces.
      The Best Gluten-Free Chocolate Chip Banana Bread (dairy free & paleo)
    • A paleo chocolate chip zucchini muffin with a bite out of it.
      Gluten-Free Chocolate Chip Zucchini Muffins (dairy-free & paleo)
    • A bowl of Whole30 asian coleslaw with dressing being poured on it.
      The Best Healthy Asian Coleslaw Salad
    • A jar of berry cheesecake overnight oats topped with fresh berries with a spoon in it.
      The Best Berry Cheesecake Overnight Oats

    Footer

    featured on:

    Sign up for emails and updates!

    Sign me up!
    • Privacy Policy
    • Accessibility Policy
    • Contact
    • Services
    • ↑ back to top

    Some of the links on this website are affiliate links whereby we make a small percentage if you purchase the product through that link. It does not cost you anything extra and helps us keep this website running. As an Amazon associate we earn a small percentage from qualifying Amazon purchases.

    Copyright © 2025 Pure & Simple Nourishment - Powered by Feast+

    203 shares
    203 shares

    Rate This Recipe

    Your vote:


    A rating is required
    A name is required
    An email is required